Ở bài viết trước mình đã giới thiệu về công nghệ Livestream và các giao thức liên quan. Vậy trong bài viết này chúng ta sẽ cùng hiện thực hóa điều này nhé.
Ở bài viết trước mình đã giới thiệu về công nghệ Livestream và các giao thức liên quan. Vậy trong bài viết này chúng ta sẽ cùng hiện thực hóa điều này nhé.
Mình sẽ sử dụng Nginx và module nginx-rtmp-module để thực hiện các demo sau:
- Streaming VOD (video on demand – video theo yêu cầu ).
- Livestream.
Mục lục
- Chuẩn bị
- Cài đặt các gói cần thiết
- Download nginx source và các module cần thiết
- Compile và Install Nginx
- Cấu hình Nginx với Systemd
- Cấu hình nginx sử dụng module rtmp
- Test Streaming video (VOD)
- Test Livestream video với Ubuntu
- Test Livestream video với Windows
Bài viết sử dụng 2 giao thức là RTMP và HLS, nếu các bạn chưa có thông tin về giao thức này có thể quay lại đọc bài viết trước của mình nhé.
Chuẩn bị
- CentOS 7 (64bit)
- 2 CPU
- 2 GB RAM
- 25 GB Disk
- Tài khoản root
- IP server trong ví dụ này là (10.10.10.193)
Cài đặt các gói cần thiết
ssh root@10.10.10.193yum -y install epel-releaseyum -y groupinstall 'Development Tools'
yum install -y wget git unzip perl perl-devel perl-ExtUtils-Embed libxslt libxslt-devel libxml2 libxml2-devel gd gd-devel pcre-devel GeoIP GeoIP-develDownload nginx source và các module cần thiết
cd ~Nginx 1.14.0
wget https://nginx.org/download/nginx-1.14.0.tar.gz
tar -xzvf nginx-1.14.0.tar.gz
Pcre 8.42
wget https://ftp.pcre.org/pub/pcre/pcre-8.42.zip
unzip pcre-8.42.zip
Zlib 1.2.11
wget https://www.zlib.net/zlib-1.2.11.tar.gz
tar -xzvf zlib-1.2.11.tar.gz
OpenSSL 1.1.0
wget https://ftp.openssl.org/source/old/1.1.0/openssl-1.1.0h.tar.gz
tar -xzvf openssl-1.1.0h.tar.gz
Nginx-RTMP-Module
git clone https://github.com/sergey-dryabzhinsky/nginx-rtmp-module.gitCompile và Install Nginx
Di chuyển đến thư mục nginx vừa giải nén
cd ~/nginx-1.14.0/Config nginx với các parameter sau:
./configure --prefix=/etc/nginx \
            --sbin-path=/usr/sbin/nginx \
            --modules-path=/usr/lib64/nginx/modules \
            --conf-path=/etc/nginx/nginx.conf \
            --error-log-path=/var/log/nginx/error.log \
            --pid-path=/var/run/nginx.pid \
            --lock-path=/var/run/nginx.lock \
            --user=nginx \
            --group=nginx \
            --build=CentOS \
            --builddir=nginx-1.14.0 \
            --with-select_module \
            --with-poll_module \
            --with-threads \
            --with-file-aio \
            --with-http_ssl_module \
            --with-http_v2_module \
            --with-http_realip_module \
            --with-http_addition_module \
            --with-http_xslt_module=dynamic \
            --with-http_image_filter_module=dynamic \
            --with-http_geoip_module=dynamic \
            --with-http_sub_module \
            --with-http_dav_module \
            --with-http_flv_module \
            --with-http_mp4_module \
            --with-http_gunzip_module \
            --with-http_gzip_static_module \
            --with-http_auth_request_module \
            --with-http_random_index_module \
            --with-http_secure_link_module \
            --with-http_degradation_module \
            --with-http_slice_module \
            --with-http_stub_status_module \
            --http-log-path=/var/log/nginx/access.log \
            --http-client-body-temp-path=/var/cache/nginx/client_temp \
            --http-proxy-temp-path=/var/cache/nginx/proxy_temp \
            --http-fastcgi-temp-path=/var/cache/nginx/fastcgi_temp \
            --http-uwsgi-temp-path=/var/cache/nginx/uwsgi_temp \
            --http-scgi-temp-path=/var/cache/nginx/scgi_temp \
            --with-mail=dynamic \
            --with-mail_ssl_module \
            --with-stream=dynamic \
            --with-stream_ssl_module \
            --with-stream_realip_module \
            --with-stream_geoip_module=dynamic \
            --with-stream_ssl_preread_module \
            --with-compat \
            --with-pcre=../pcre-8.42 \
            --with-pcre-jit \
            --with-zlib=../zlib-1.2.11 \
            --with-openssl=../openssl-1.1.0h \
            --with-openssl-opt=no-nextprotoneg \
            --add-module=../nginx-rtmp-module \
            --with-debug
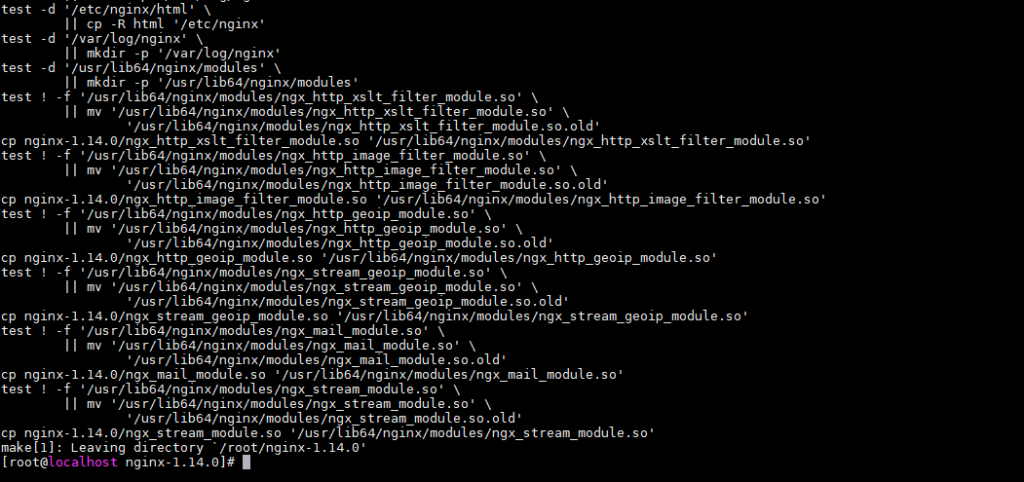
Compile và cài đặt Nginx với Make
make
make install
Tạo Symlink cho folder module
ln -s /usr/lib64/nginx/modules /etc/nginx/modulesTạo mới User và Group cho nginx
useradd -r -d /var/cache/nginx/ -s /sbin/nologin -U nginxTạo thư mục cache và phân quyền cho user nginx
mkdir -p /var/cache/nginx/
chown -R nginx:nginx /var/cache/nginx/
Kiểm tra lại cài đặt
nginx -t
nginx -V
Cấu hình Nginx với Systemd
Tạo một file service cho nginx
cat << EOF >> /lib/systemd/system/nginx.service
[Unit]
Description=nginx - high performance web server
Documentation=https://nginx.org/en/docs/
After=network-online.target remote-fs.target nss-lookup.target
Wants=network-online.target

[Service]
Type=forking
PIDFile=/var/run/nginx.pid
ExecStartPre=/usr/sbin/nginx -t -c /etc/nginx/nginx.conf
ExecStart=/usr/sbin/nginx -c /etc/nginx/nginx.conf
ExecReload=/bin/kill -s HUP $MAINPID
ExecStop=/bin/kill -s TERM $MAINPID

[Install]
WantedBy=multi-user.target
EOF
Reload lại systemd
systemctl daemon-reloadKhởi động nginx
systemctl start nginx
systemctl enable nginx
Cấu hình nginx sử dụng module rtmp
Backup lại cấu hình gốc
mv /etc/nginx/nginx.conf /etc/nginx/nginx.conf.originTạo file cấu hình nginx
cat << EOF >> /etc/nginx/nginx.conf
worker_processes  auto;
events {
    worker_connections  1024;
}

# RTMP configuration
rtmp {
    server {
        listen 1935; # Listen on standard RTMP port
        chunk_size 4000;

	# RTMP video on demand MP4
        application vod {
            play /opt/video_storage;
        }

        # RTMP livestream (Streamer)
        application rtmp_livestream {
            live on;
        }

	# Client is watching livestream
	application hls_livestream {
            live on;
            hls on;
            hls_path /opt/hls/;
            hls_fragment 3;
            hls_playlist_length 60;
            deny play all;
        }
    }
}

http {
    sendfile off;
    tcp_nopush on;
    aio on;
    directio 512;
    default_type application/octet-stream;

    server {
        listen 8080;

        location / {
            add_header 'Cache-Control' 'no-cache';

            # CORS configuration
            add_header 'Access-Control-Allow-Origin' '*' always;
            add_header 'Access-Control-Expose-Headers' 'Content-Length';
            if (\$request_method = 'OPTIONS') {
                add_header 'Access-Control-Allow-Origin' '*';
                add_header 'Access-Control-Max-Age' 1728000;
                add_header 'Content-Type' 'text/plain charset=UTF-8';
                add_header 'Content-Length' 0;
                return 204;
            }

            types {
                application/dash+xml mpd;
                application/vnd.apple.mpegurl m3u8;
                video/mp2t ts;
            }

            root /opt/;
        }
    }
}
EOF
Tạo một thư mục để chứa các file video phục vụ streaming (VOD)
mkdir -p /opt/video_storage
chown -R nginx:nginx /opt/video_storage
Download file video mp4 mẫu
cd /opt/video_storage
wget https://github.com/blogcloud365vn/Storage/raw/master/cloud365.mp4 -O cloud365.mp4
Restart lại Nginx
nginx -t
systemctl restart nginx
Mở port trên firewall
firewall-cmd --zone=public --add-port=8080/tcp --permanent
firewall-cmd --zone=public --add-port=1935/tcp --permanent
firewall-cmd --reload
RTMP Streaming video (VOD)
Vì hiện tại mình đang cấu hình tính năng này sử dụng RTMP nên cần có các Flash web hoặc các phần mềm hỗ trợ.
Một phần mềm thông dụng hỗ trợ đó là VLC.
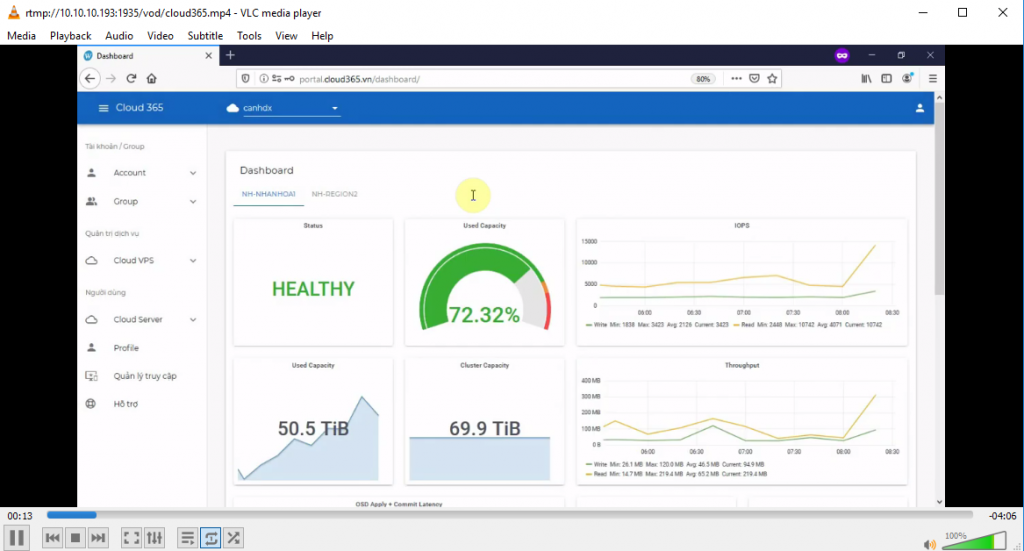
Các bạn khởi động VLC Tại phần Media chọn Open Network Stream

Tại ô input các bạn nhập rtmp://10.10.10.193:1935/vod/cloud365.mp4 . Trong đó 10.10.10.193 là IP server của bạn, cloud365.vn là video được lưu tại đường dẫn /opt/video_storage
Sau đó chọn Play


RTMP – HLS Livestream một video Từ Ubuntu
Vì mình đang dùng Ubuntu 18.04 desktop và mình có một video khá hay muốn livestream cho mọi người cùng xem qua server livestream mà mình vừa dựng.
Đầu tiên mình cài đặt thêm gói ffmpeg để hỗ trợ xử lý video khi livestream trên Ubuntu
sudo apt-get install ffmpeg -yTải video mẫu về
wget https://github.com/blogcloud365vn/Storage/raw/master/cloud365.mp4 -O cloud365.mp4Tiếp đó mình chạy câu lệnh
ffmpeg -re -i cloud365.mp4 -vcodec libx264 -vprofile baseline -g 30 -acodec aac -strict -2 -f flv rtmp://10.10.10.193/hls_livestream/livestream1Trong đó
- cloud365.mp4 : là đường dẫn đến file video bạn muốn livestream
- rtmp://10.10.10.193/hls_livestream/livestream1: là đường dẫn của server nginx, livestream1 là tên của video livestream của bạn
Bởi vì HLS là giao thức http-based nên tiếp theo tại máy client mình download source code demo sau: source code
Đây là một file html demo sử dụng thư viện http-stream. Các bạn có thể tham khảo thêm thư viện này tại đây
Sau khi download giải nén xong các bạn có được một thư mục trông thế này

Sử dụng trình soạn thảo ưu thích của bạn để chỉnh sửa lại file live.html. Ở đây mình dùng Notepad++. Các bạn sửa file với nội dung như sau:
<!DOCTYPE html>
<html>
<head>
<meta charset=utf-8 />
<title>videojs-contrib-hls embed</title>

  <link href="video-js.css" rel="stylesheet">
</head>
<body>
  <h1>Video.js Example Embed</h1>

  <video-js id="my_video_1" class="vjs-default-skin" controls preload="auto" width="640" height="268">
    <source src="http://10.10.10.193:8080/hls/livestream1.m3u8" type="application/x-mpegURL">
  </video-js>

  <script src="video.js"></script>
  <script src="videojs-http-streaming.js"></script>

  <script>
    var player = videojs('my_video_1');
  </script>

</body>
</html>
Trong đó http://10.10.10.193:8080/hls/livestream1.m3u8 là đường dẫn đến livestream mà bạn đã phát trước đó.
Save lại file và mở nó bằng cách double click và kết quả là:

LiveStream trên Windows
Đối với các streamer đã quá quen thuộc với phần mềm OBS trên windows (hoặc các bạn muốn test cần cài đặt OBS ).
Tại phần Settings → Stream các bạn cài đặt lại như sau:

Trong đó :
- rtmp://10.10.10.193/hls_livestream/: là URL đến Livestream server
- livestream1: Là key của buổi livestream đó
Tiếp theo tương tự khi thực hiện với Ubuntu, bạn đóng vai người xem qua http. Bạn download bộ source code sau: source code
Sau khi download giải nén xong các bạn có được một thư mục trông thế này

Sử dụng trình soạn thảo ưu thích của bạn để chỉnh sửa lại file live.html. Ở đây mình dùng Notepad++. Các bạn sửa file với nội dung như sau:
<!DOCTYPE html>
<html>
<head>
<meta charset=utf-8 />
<title>videojs-contrib-hls embed</title>

  <link href="video-js.css" rel="stylesheet">
</head>
<body>
  <h1>Video.js Example Embed</h1>

  <video-js id="my_video_1" class="vjs-default-skin" controls preload="auto" width="640" height="268">
    <source src="http://10.10.10.193:8080/hls/livestream1.m3u8" type="application/x-mpegURL">
  </video-js>

  <script src="video.js"></script>
  <script src="videojs-http-streaming.js"></script>

  <script>
    var player = videojs('my_video_1');
  </script>

</body>
</html>
Trong đó http://10.10.10.193:8080/hls/livestream1.m3u8 là đường dẫn đến livestream + key mà bạn cài đặt ở bước trước.
Save lại file và mở nó bằng cách double click và kết quả là:

Kết luận
Bài viết đến đây cũng đã khá dài rồi, mình phải dừng phím thôi
Qua bài viết này mình muốn chia sẻ đến các bạn các kiến thức mà mình cóp nhặt được trên Internet. Hy vọng nó sẽ giúp ích một phần nào đó cho các bạn.
Cảm ơn các bạn đã theo dõi và chúc các bạn thành công !
Mình muốn public livestream từ web luôn và phát ra android device. Hiện hướng dẫn chỉ thấy dùng các công cụ có sẵn như OBS, Xplit,…
Xin chào mình cảm ơn vì bài viết rất chi tiết và đã làm thành công,
cho mình hỏi khi cấu hình CORS cho 1 domain thì ok, nhưng multidomain thì mình chưa làm được, bạn có thể viết thêm phần cors multidomain để mình tham khảo được không.
Xin cảm ơn!