Trong phần trước, Cloud365 đã hướng dẫn các bạn triển khai LDAP trên CentOS 7. Trong bài này, mình sẽ hướng dẫn các bạn bảo mật dịch vụ LDAP khi triển khai trên hạ tầng dịch vụ Cloud365.
Tóm tắt, LDAP viết tắt của Lightweight Directory Access Protocol là một giao thức dạng client-server được phát triển trên chuẩn X500 có chức năng phục vụ cho việc truy cập dịch vụ thư mục.
1. Cấu hình đề nghị
Đề triển khai dịch vụ LDAP, mình khuyên cáo các bạn đăng ký SSD CLOUD VPS B. Cấu hình chi tiết như sau:
- Hệ điều hành: CentOS 7
- CPU: 2 Core
- RAM: 2 GB
- DISK: 25 GB
- Network: 2 interface
- Dải quản trị, cho phép người quản trị kết nối từ xa (ETH0)
- Dải nội bộ, phục vụ kết nối giao thức LDAP (ETH1)
Trong bài, Cloud VPS của mình sẽ có IP:
- ETH0 – 103.101.163.199
- ETH1 – 10.10.10.13
2. Chuẩn bị
Cấu hình trỏ domain về địa chỉ IP Public do Cloud365 cung cấp, trong bài mình đã cấu hình:
- ldap.workfromhome.vn – 103.101.163.199
Để trỏ Domain bạn, bạn tham khảo tài liệu – Hướng dẫn trỏ IP cho tên miền trên zonedns.vn
Cài đặt dịch vụ LDAP – Hướng dẫn cài đặt LDAP trên CentOS 7
Sau khi cấu hình xong dịch vụ LDAP, chúng ta sẽ có các thông tin như sau:
LDAP URL: 10.10.10.13
PORT: 389
BIND DN: cn=Manager,dc=workfromhome,dc=vn
BIND PASSWORD: Cloud365a@1233. Bảo mật dịch vụ LDAP
3.1. Cấu hình giao diện PHPLdapAdmin sử dụng giao thức HTTPS
Cấu hình Virtualhost cho trang quản trị PHPLdapAdmin
cat > /etc/httpd/conf.d/phpldapadmin.conf << EOF
<VirtualHost *:80>
    ServerName ldap.workfromhome.vn

    Alias /phpldapadmin /usr/share/phpldapadmin/htdocs
    Alias /ldapadmin /usr/share/phpldapadmin/htdocs

    <Directory /usr/share/phpldapadmin/htdocs>
    <IfModule mod_authz_core.c>
        # Apache 2.4
        Require all granted
    </IfModule>
    <IfModule !mod_authz_core.c>
        # Apache 2.2
        Order Deny,Allow
        Deny from all
        Allow from 127.0.0.1
        Allow from ::1
    </IfModule>
    </Directory>
</VirtualHost>
EOF
Cấu hình tự động redirect về trang web PHPLdapAdmin
filehtml=/var/www/html/index.html
touch $filehtml
cat << EOF >> $filehtml
<html>
<head>
<META HTTP-EQUIV="Refresh" Content="0.5; URL=http://ldap.workfromhome.vn/phpldapadmin">
</head>
<body>
<center> <h1>Redirecting to PHP LDAP ADMIN</h1> </center>
</body>
</html>
EOF
Cấu hình HTTPS với Let’s Encrypt
yum install epel-release -y
yum install certbot python2-certbot-apache mod_ssl -y
certbot --apache -d ldap.workfromhome.vn
Kết quả
[root@wfhldap conf.d]# certbot --apache -d ldap.workfromhome.vn
Saving debug log to /var/log/letsencrypt/letsencrypt.log
Plugins selected: Authenticator apache, Installer apache
Starting new HTTPS connection (1): acme-v02.api.letsencrypt.org
Obtaining a new certificate
Performing the following challenges:
http-01 challenge for ldap.workfromhome.vn
Waiting for verification...
Cleaning up challenges
Created an SSL vhost at /etc/httpd/conf.d/phpldapadmin-le-ssl.conf
Deploying Certificate to VirtualHost /etc/httpd/conf.d/phpldapadmin-le-ssl.conf

Please choose whether or not to redirect HTTP traffic to HTTPS, removing HTTP access.
- - - - - - - - - - - - - - - - - - - - - - - - - - - - - - - - - - - - - - - -
1: No redirect - Make no further changes to the webserver configuration.
2: Redirect - Make all requests redirect to secure HTTPS access. Choose this for
new sites, or if you're confident your site works on HTTPS. You can undo this
change by editing your web server's configuration.
- - - - - - - - - - - - - - - - - - - - - - - - - - - - - - - - - - - - - - - -
Select the appropriate number [1-2] then [enter] (press 'c' to cancel): 2
Redirecting vhost in /etc/httpd/conf.d/phpldapadmin.conf to ssl vhost in /etc/httpd/conf.d/phpldapadmin-le-ssl.conf

- - - - - - - - - - - - - - - - - - - - - - - - - - - - - - - - - - - - - - - -
Congratulations! You have successfully enabled https://ldap.workfromhome.vn

You should test your configuration at:
https://www.ssllabs.com/ssltest/analyze.html?d=ldap.workfromhome.vn
- - - - - - - - - - - - - - - - - - - - - - - - - - - - - - - - - - - - - - - -

IMPORTANT NOTES:
 - Congratulations! Your certificate and chain have been saved at:
   /etc/letsencrypt/live/ldap.workfromhome.vn/fullchain.pem
   Your key file has been saved at:
   /etc/letsencrypt/live/ldap.workfromhome.vn/privkey.pem
   Your cert will expire on 2020-07-06. To obtain a new or tweaked
   version of this certificate in the future, simply run certbot again
   with the "certonly" option. To non-interactively renew *all* of
   your certificates, run "certbot renew"
 - If you like Certbot, please consider supporting our work by:

   Donating to ISRG / Let's Encrypt:   https://letsencrypt.org/donate
   Donating to EFF:                    https://eff.org/donate-le
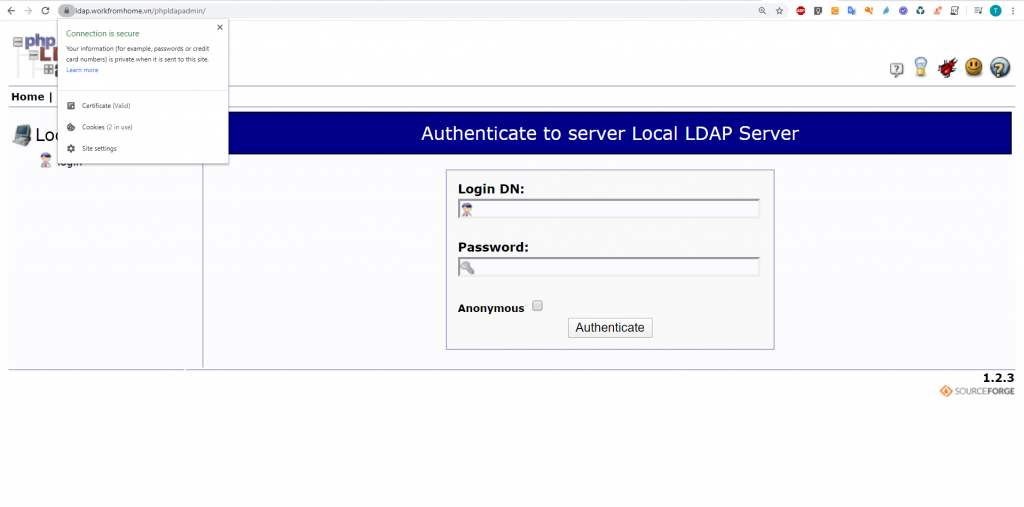
Truy cập địa chỉ: http://ldap.workfromhome.vn/phpldapadmin/

Đăng nhập với thông tin sau:
Login DN: cn=Manager,dc=workfromhome,dc=vn
Password: Cloud365a@123
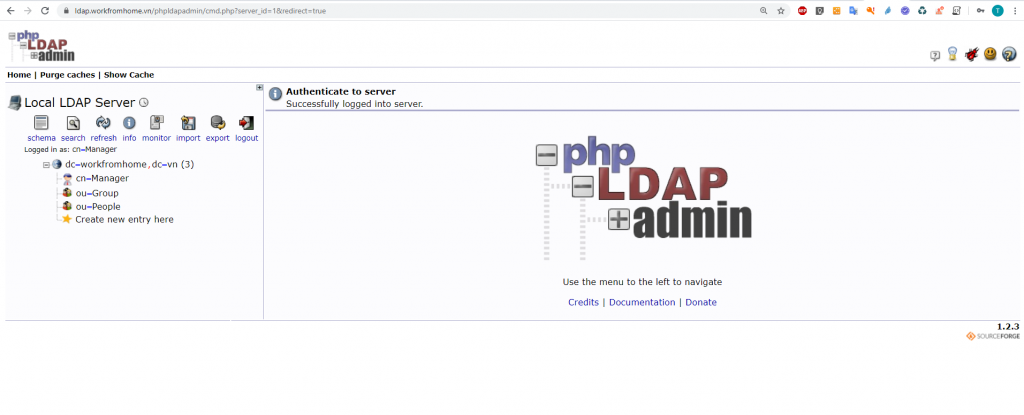
Kết quả

3.2. Giới hạn kết nối dịch vụ LDAP
Trong bài, mình sẽ giới hạn chỉ có thể kết nối tới LDAP thông qua dải nội bộ 10.10.10.13. Để làm được, mình sẽ cấu hình Firewalld cho Cloud VPS
Khởi động Firewalld
systemctl enable firewalld
systemctl start firewalld
Tại đây, mình sẽ chia làm 2 vùng (2 Zone) trong đó:
- Public (ETH0): Chỉ cho phép kết nối SSH, HTTP, HTTPS
- Home (ETH1): Chỉ cho phép kết nối LDAP
Thay đổi interface trên Zone:
firewall-cmd --zone=home --change-interface=eth1Kiểm tra
firewall-cmd --get-active-zonesKết quả
[root@wfhldap ~]# firewall-cmd --get-active-zones
home
  interfaces: eth1
public
  interfaces: eth0
Thêm Rule vào các Zone
firewall-cmd --zone=public --add-service=http
firewall-cmd --zone=public --add-service=https
firewall-cmd --zone=public --add-service=http --permanent
firewall-cmd --zone=public --add-service=https --permanent


firewall-cmd --zone=home --add-service=ldap
firewall-cmd --zone=home --add-service=ldap --permanent

firewall-cmd --reload
Kiểm tra
firewall-cmd --zone=public --list-all
firewall-cmd --zone=home --list-all
Kết quả
[root@wfhldap ~]# firewall-cmd --zone=public --list-all

public (active)
  target: default
  icmp-block-inversion: no
  interfaces: eth0
  sources:
  services: dhcpv6-client http https ssh
  ports:
  protocols:
  masquerade: no
  forward-ports:
  source-ports:
  icmp-blocks:
  rich rules:

[root@wfhldap ~]# firewall-cmd --zone=home --list-all
home (active)
  target: default
  icmp-block-inversion: no
  interfaces: eth1
  sources:
  services: dhcpv6-client ldap mdns samba-client ssh
  ports:
  protocols:
  masquerade: no
  forward-ports:
  source-ports:
  icmp-blocks:
  rich rules:
Tới đây đã kết thúc hướng dẫn triển khai dịch vụ LDAP trên hạ tầng Cloud365. Chúc các bạn thành công!
Leave a Reply