
Chắc hẳn các bạn đã nghe tới 2 khái niệm CI và CD và muốn tự động hóa một phần hoặc hoàn toàn qui trình phát triển sản phẩm của mình. Vậy trong bài viết này, Cloud365 sẽ hướng dẫn các bạn cách tích hợp Gitlab với Jenkins để thực hiện một luồng CI CD đơn giản
Yêu cầu
Lưu ý, trong bài Node Jenkins và Gitlab của mình sẽ có IP như sau
- Jenkins: 10.10.10.81
- Gitlab: 10.10.10.85
Mô tả
Luồng sau khi tích hợp Gitlab với Jenkin sẽ hoạt động như sau:
- Khi commit source code tới Gitlab, Gitlab sẽ gửi webhook tới Jenkins
- Jenkins nhận Webhook, và xử lý:
- Clone source code
- Build source code thành Container
- Chạy test Django
- Deploy source bằng Docker Compose
Phần 1: Chuẩn bị Repo Gitlab
Lưu ý: Thực hiện trên Node Gitlab
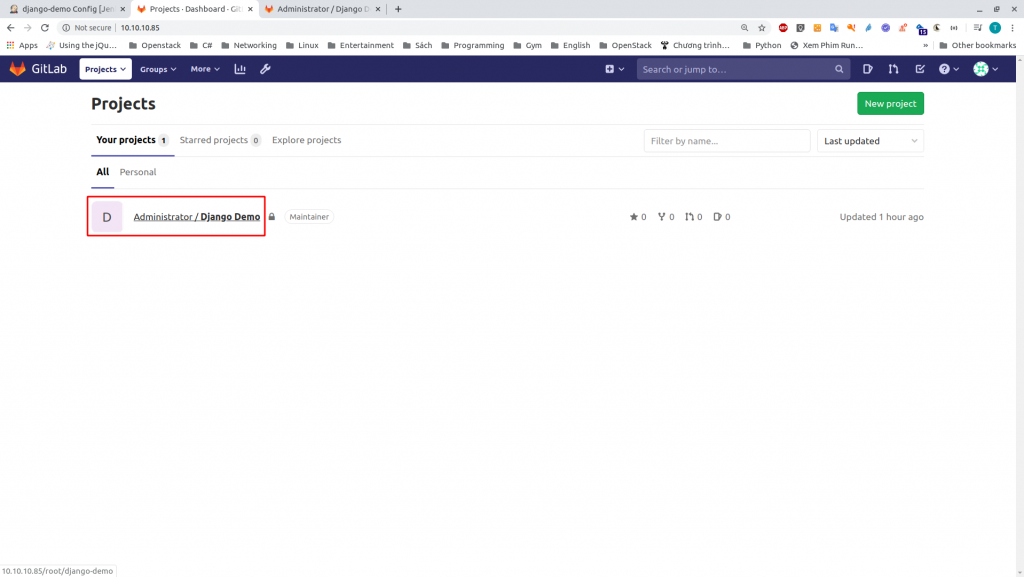
Bước 1: Khởi tạo Repo
Chọn Create a project
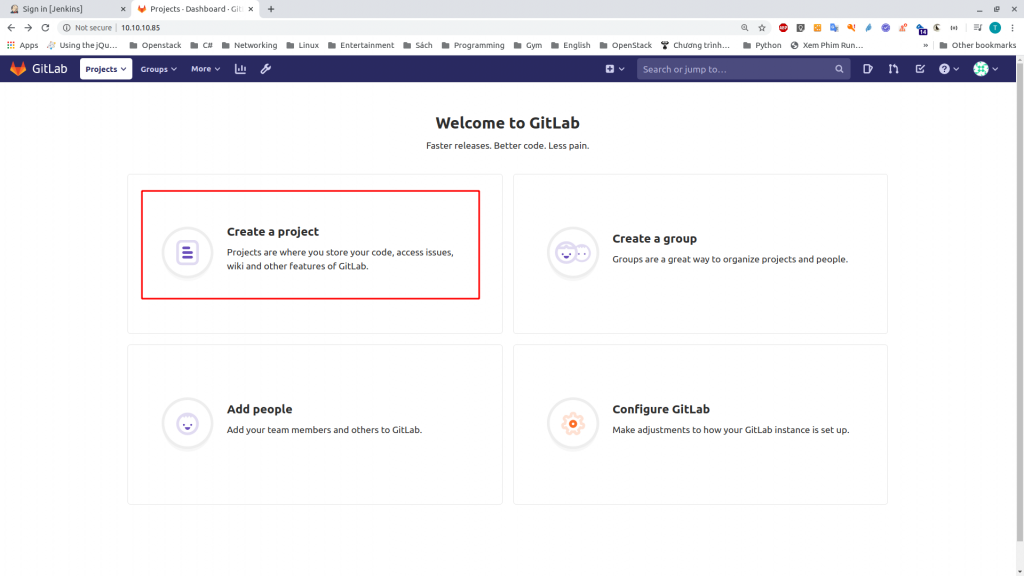
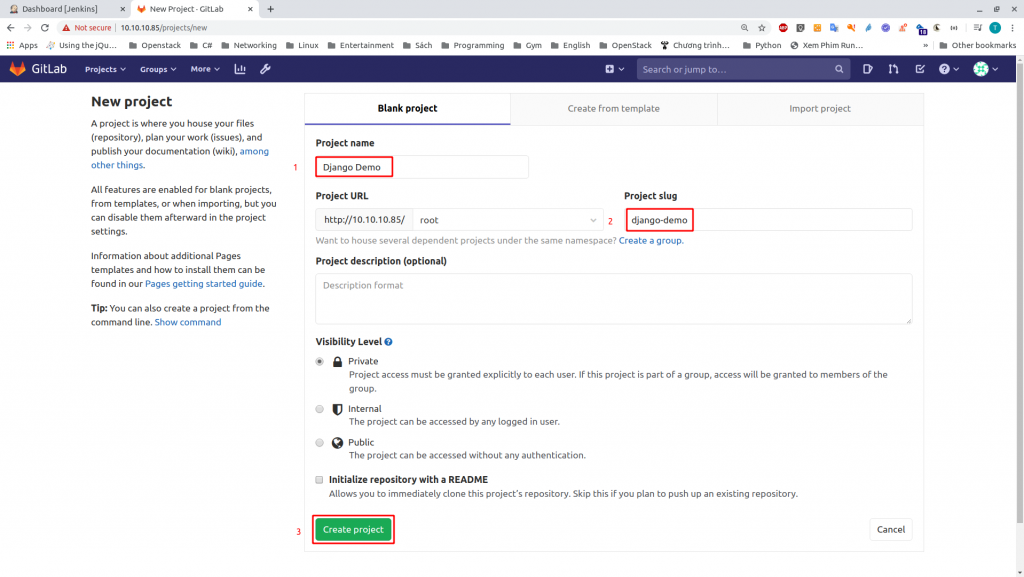
Tạo màn tạo mới Project chọn:
- Nhập
Project Name: Django Demo - Nhập
Project slug: django-demo - Chọn
Create Project
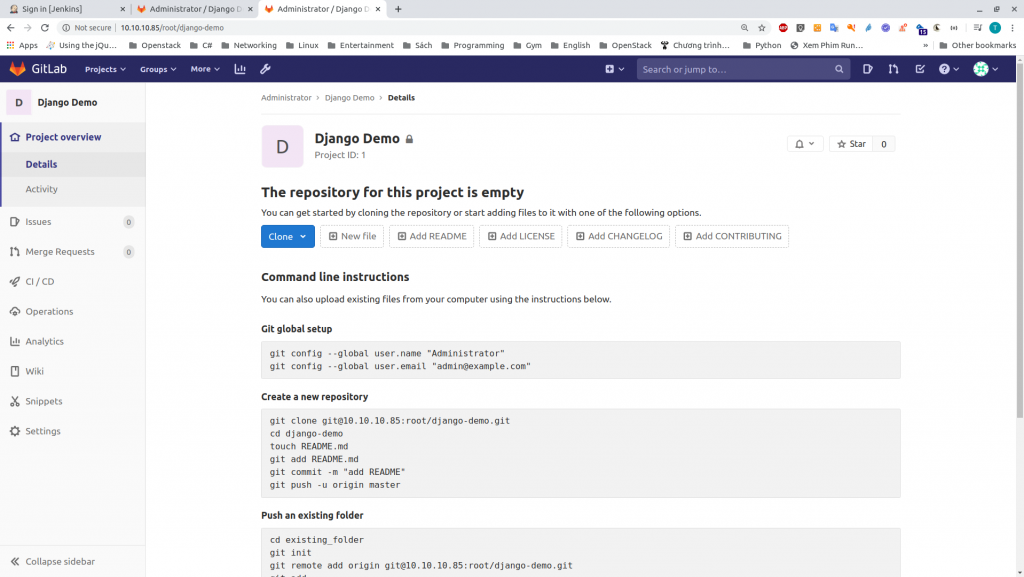
Kết quả như sau
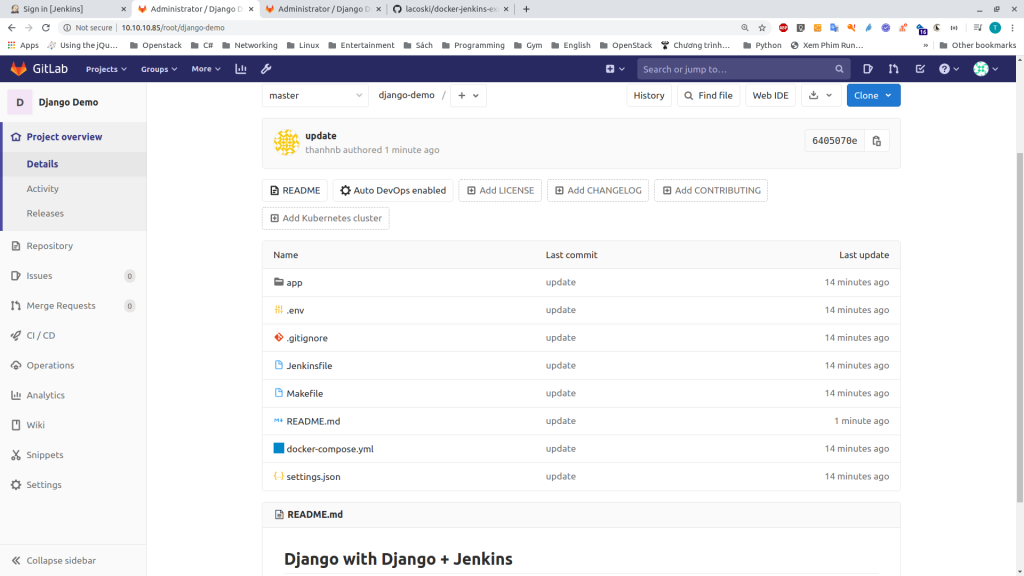
Bước 2: Tạo source code mẫu
Source code mẫu: https://github.com/lacoski/docker-jenkins-exmaple
Bạn có thể tải source dạng ZIP, giải nén trong thư mục repo gitlab vừa tạo
Kết quả
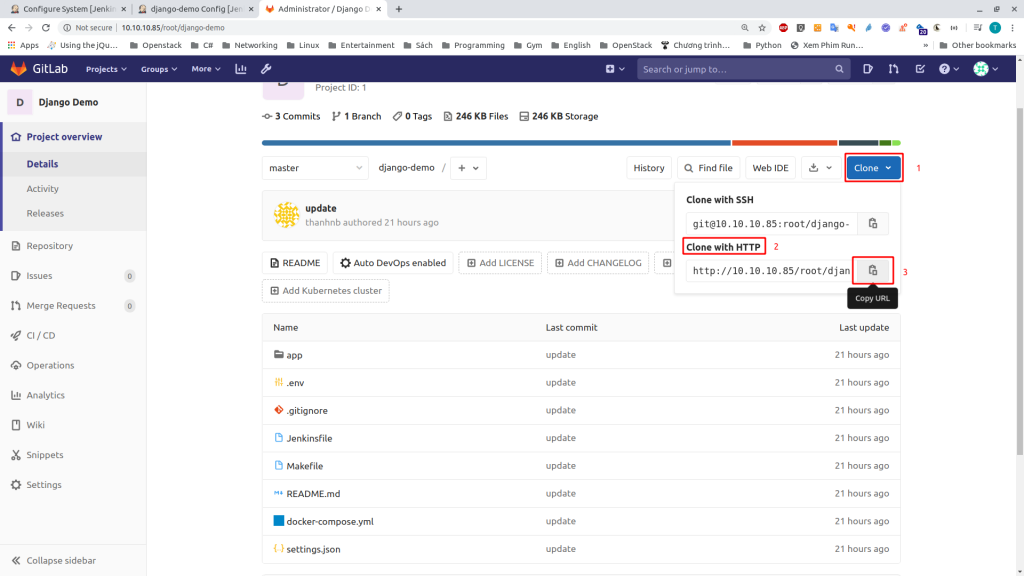
Lấy đường dẫn repo
- Chọn
Clone>Clone with HTTP>Copy - Lưu giá trị này lại (
http://10.10.10.85/root/django-demo.git), tham số này sẽ sử dụng tại phần cấu hình sau
Phần 2: Tạo mới User Jenkins trên Gitlab
Lưu ý: Thực hiện trên node Gitlab
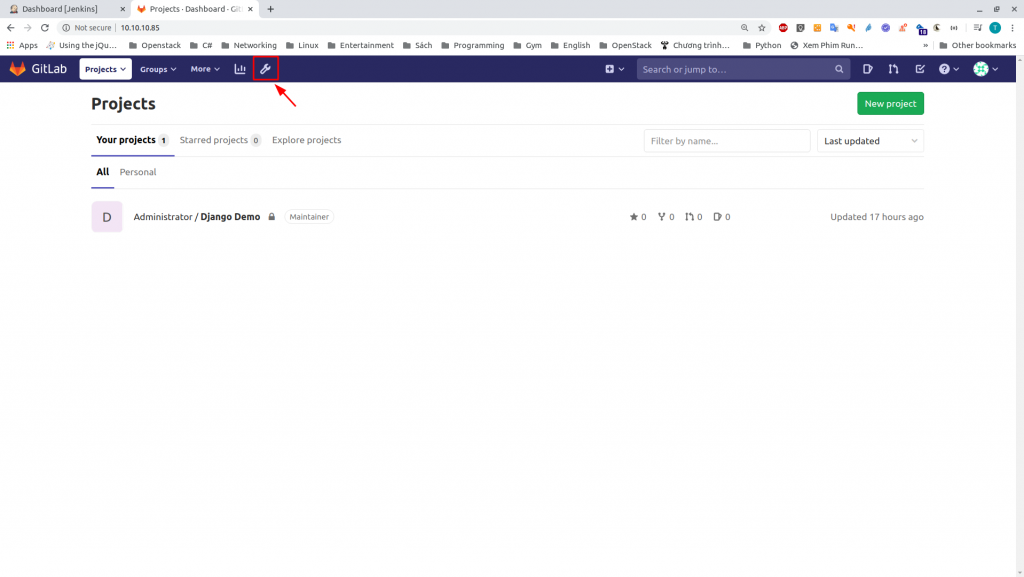
Bước 1: Chọn Setting ‘Admin’
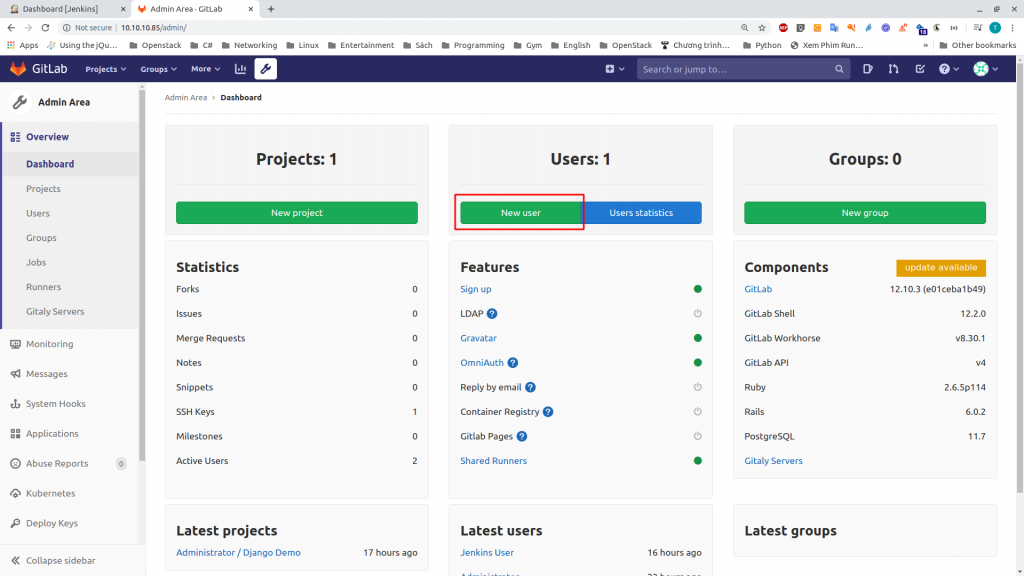
Bước 2: Chọn New user
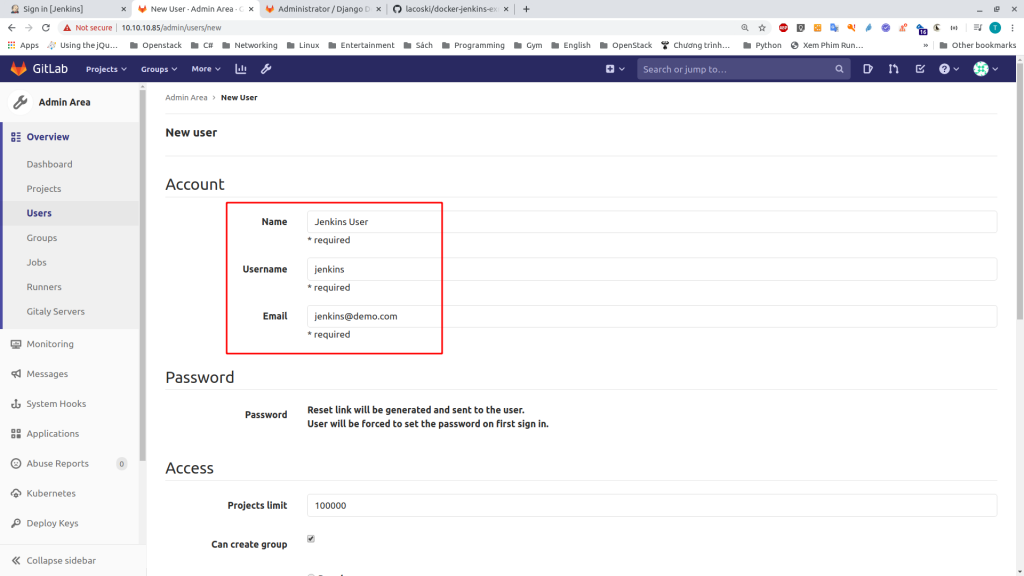
Bước 3: Nhập thông tin Account
- Name:
Jenkins User - Username:
jenkins - Email:
jenkins@demo.com
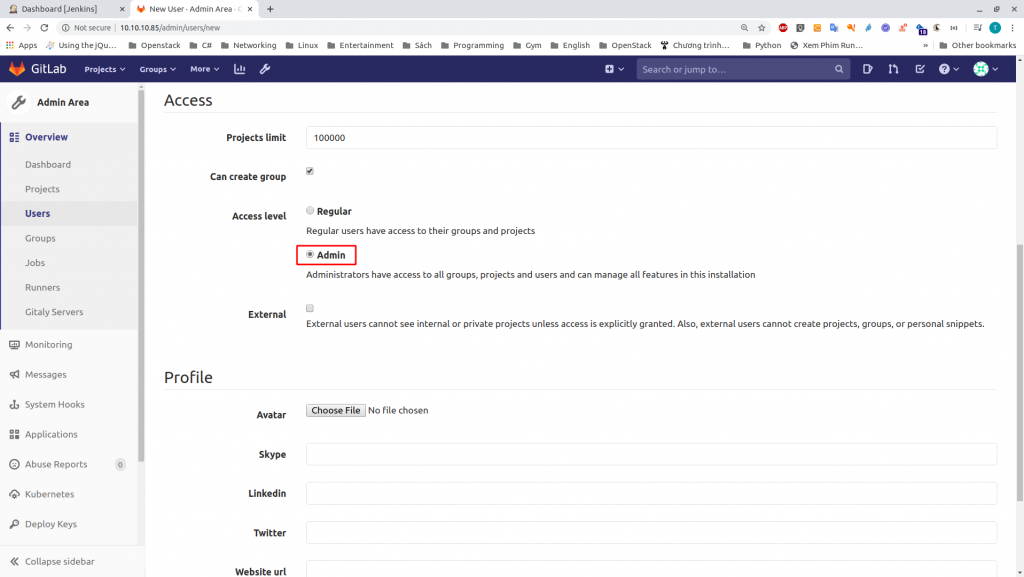
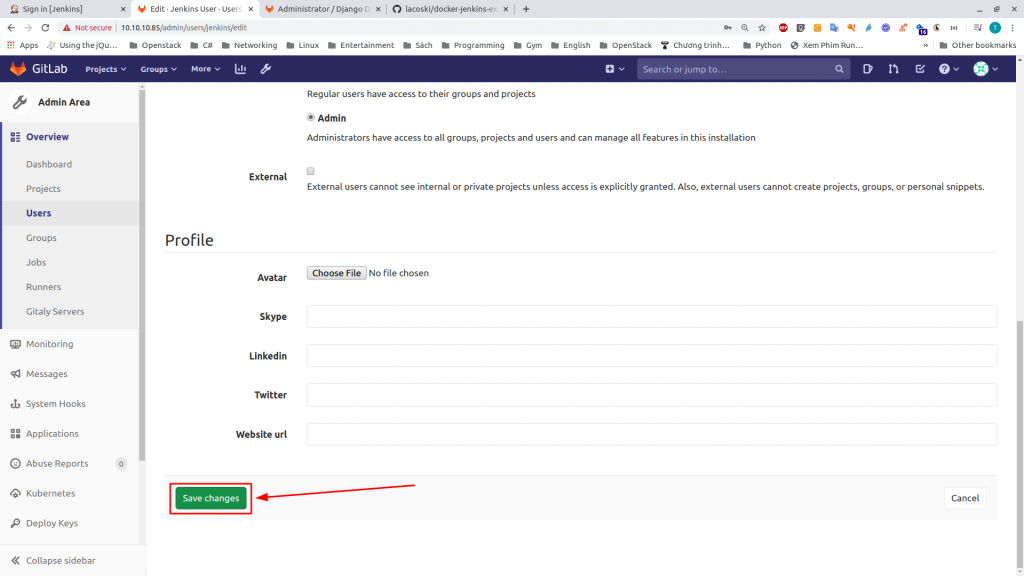
Bước 4: Tại mục Access
- Chọn Access level:
Admin
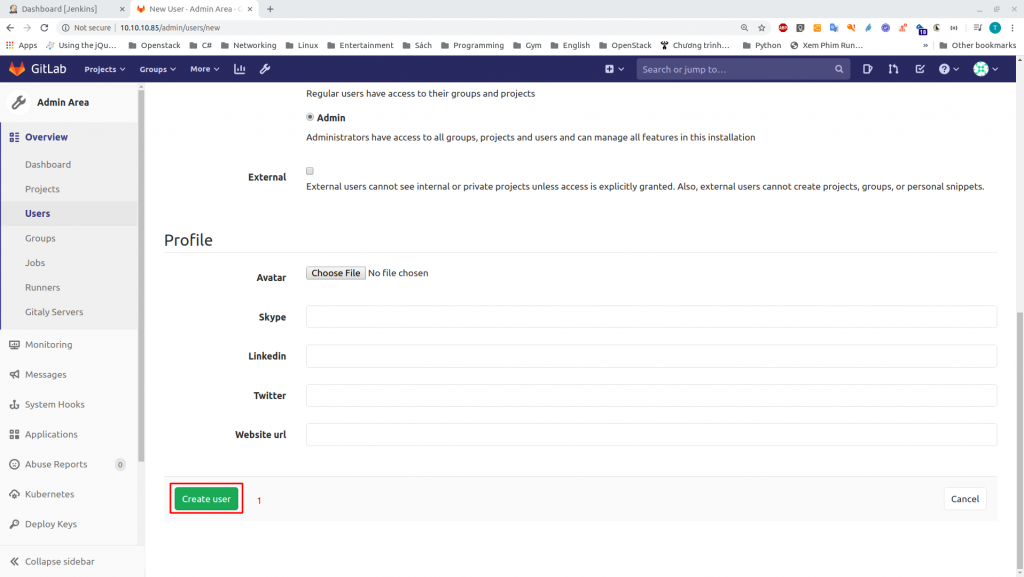
Bước 5: Chọn Create User
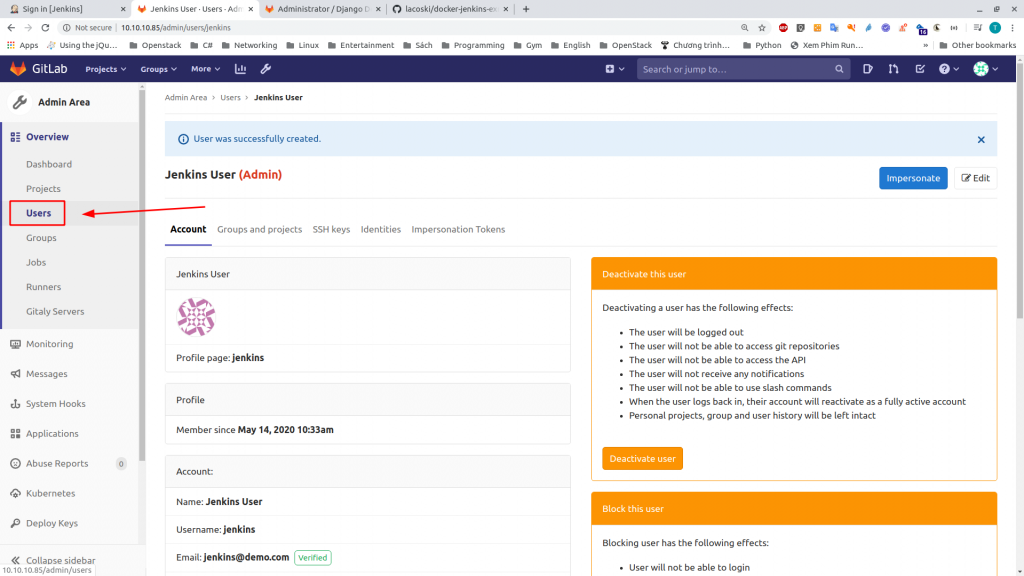
Bước 6: Chọn User
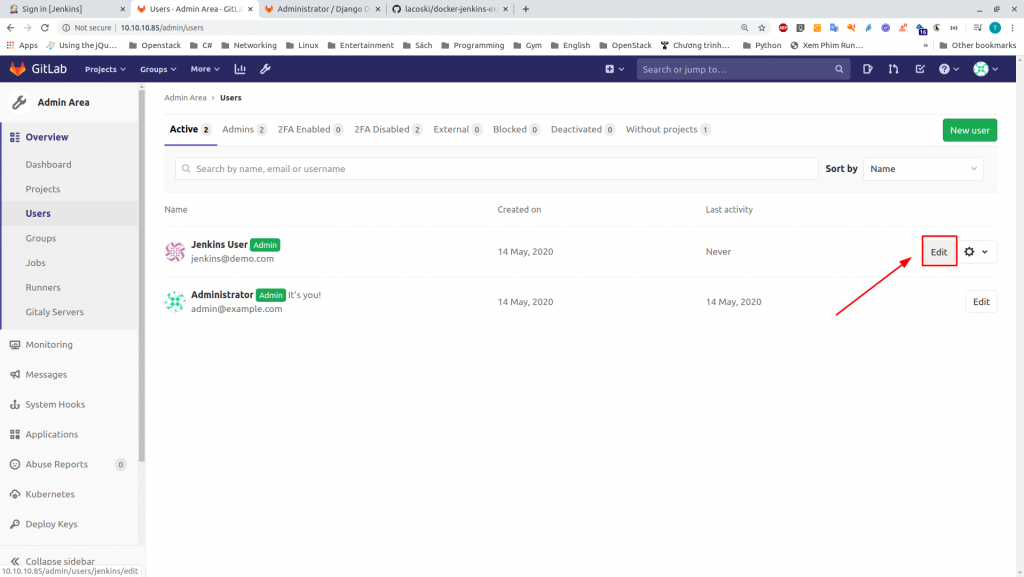
Bước 7: Chọn Edit
Bước 8: Đặt thông tin Password cho User Jenkins
Nhập 2 giá trị, Password và Password confirmation
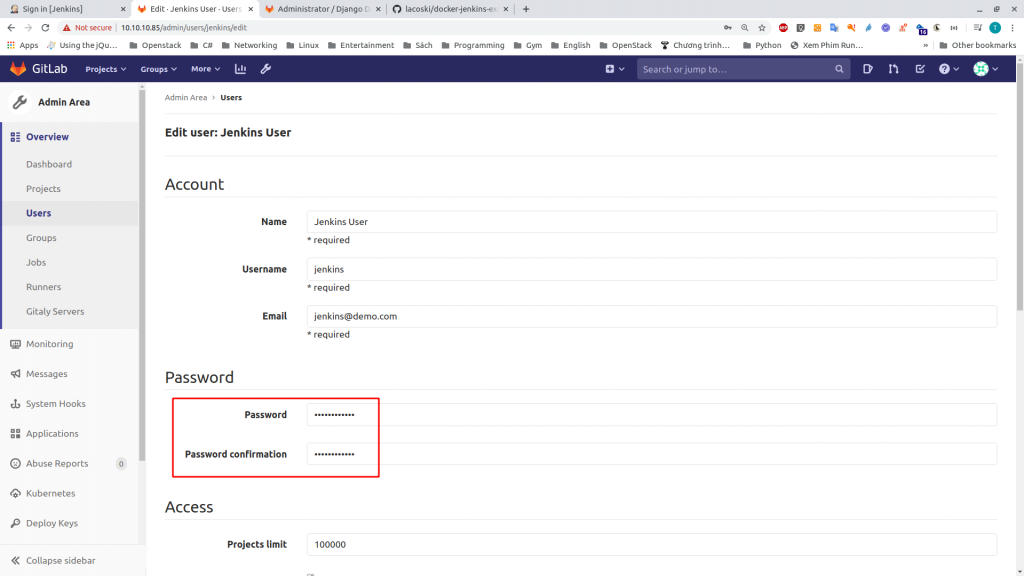
Bước 9: Chọn Save changes
Phần 3: Tạo Token User Jenkins trên Gitlab
Lưu ý: Thực hiện trên node Gitlab
Mở phiên ẩn danh http://10.10.10.85/
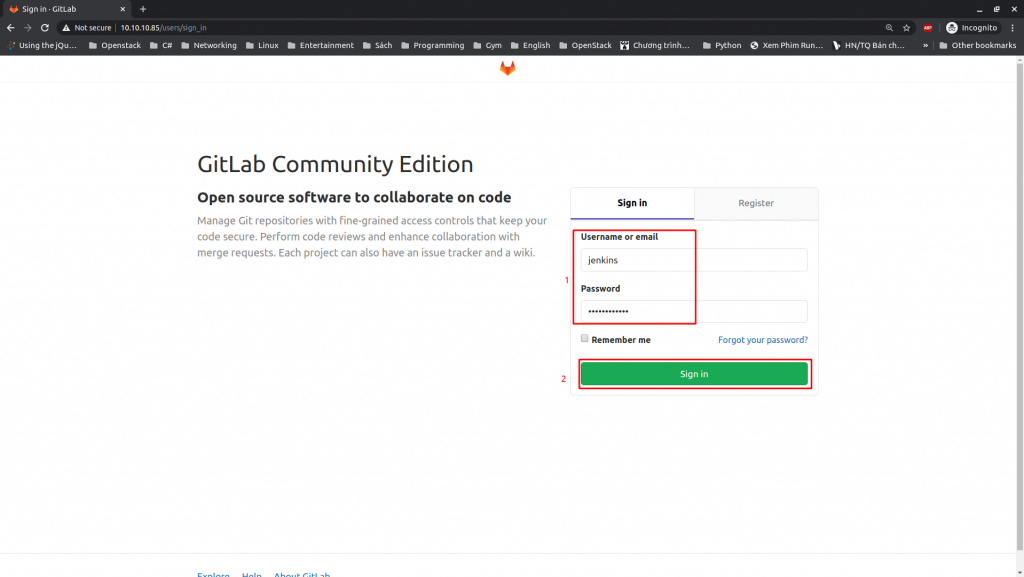
Bước 1: Đăng nhập tài khoản Jenkins
- Nhập thông tin tài khoản
- Chọn đăng nhập

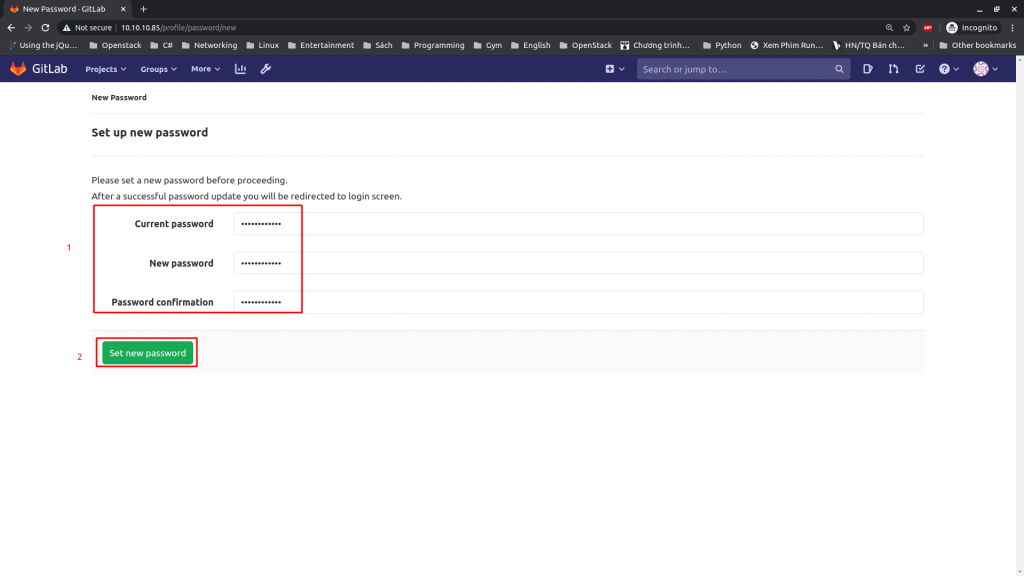
Bước 2: Đổi mật khẩu lần đầu
- Nhập mật khẩu hiện tại và mật khẩu mới, xác nhận mật khẩu mới
- Chọn Set new password
Bước 3: Đăng nhập với mật khẩu mới
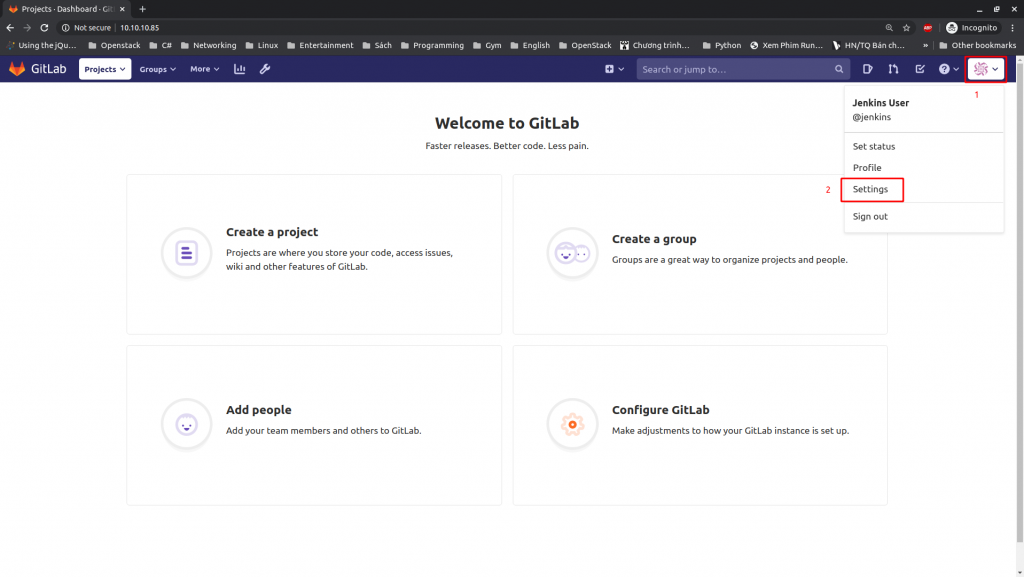
Bước 4: Mở cấu hình User
- Chọn Avatar user
- Chọn Settings
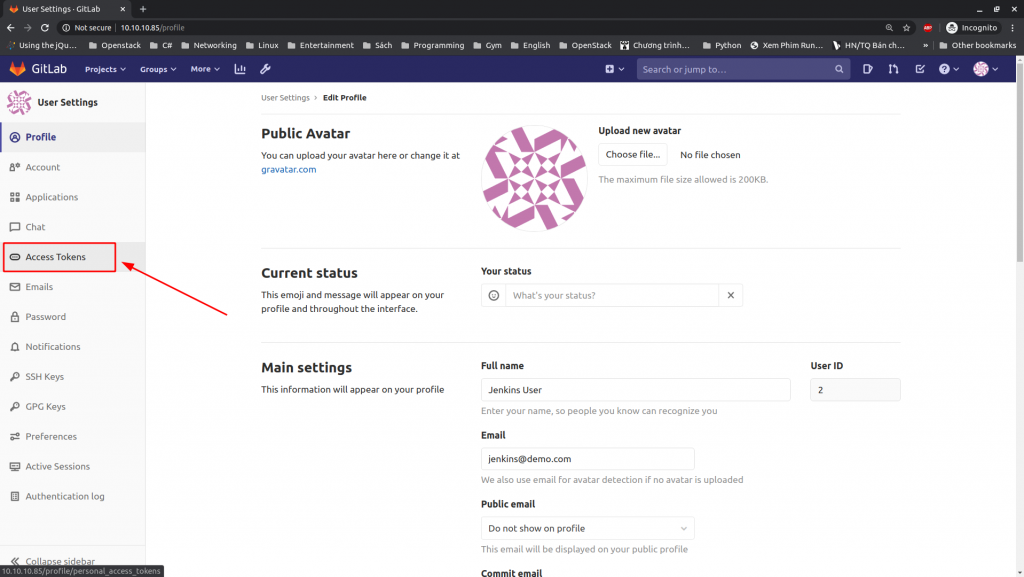
Bước 5: Chọn Access Tokens
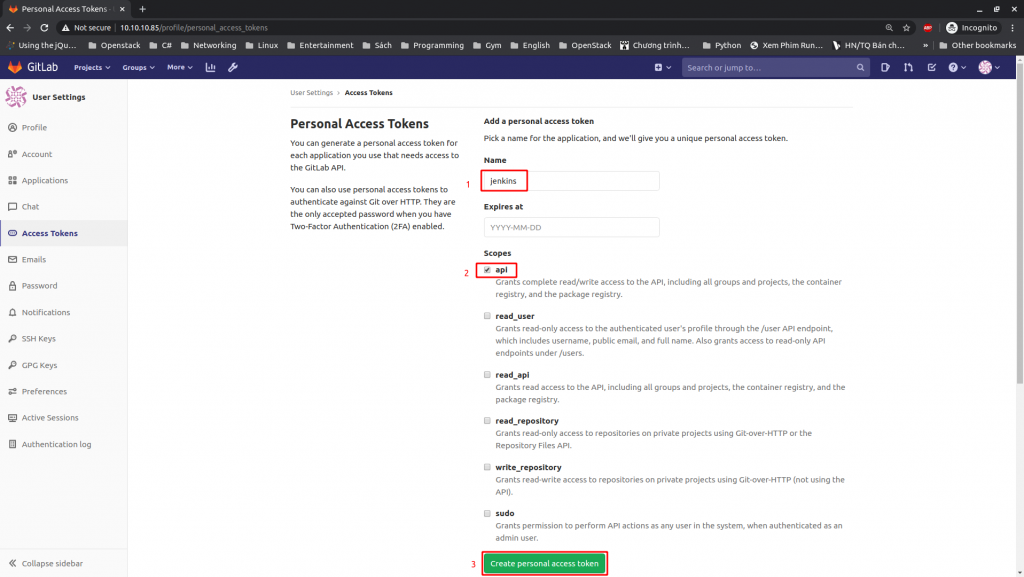
Bước 6: Nhập thông tin token
- Tại Name:
jenkins - Scopes, chọn
api - Chọn
Create personal access token
Bước 7: Chọn ‘Copy personal access token‘
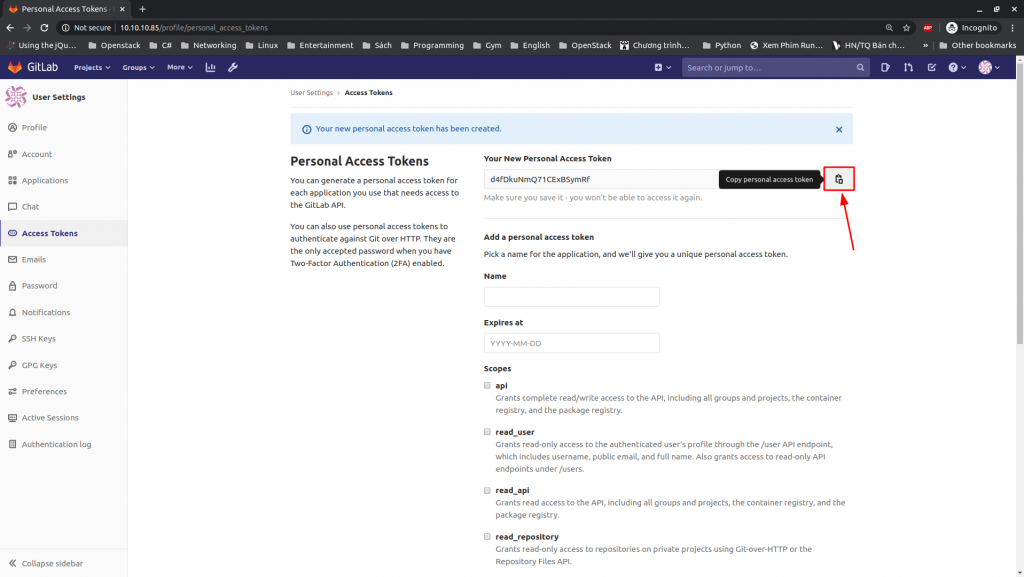
Lưu ý, copy token tới 1 nơi lưu trữ tạm vì ta sẽ cần sử dụng nó, như trong bài, token là d4fDkuNmQ71CExBSymRf
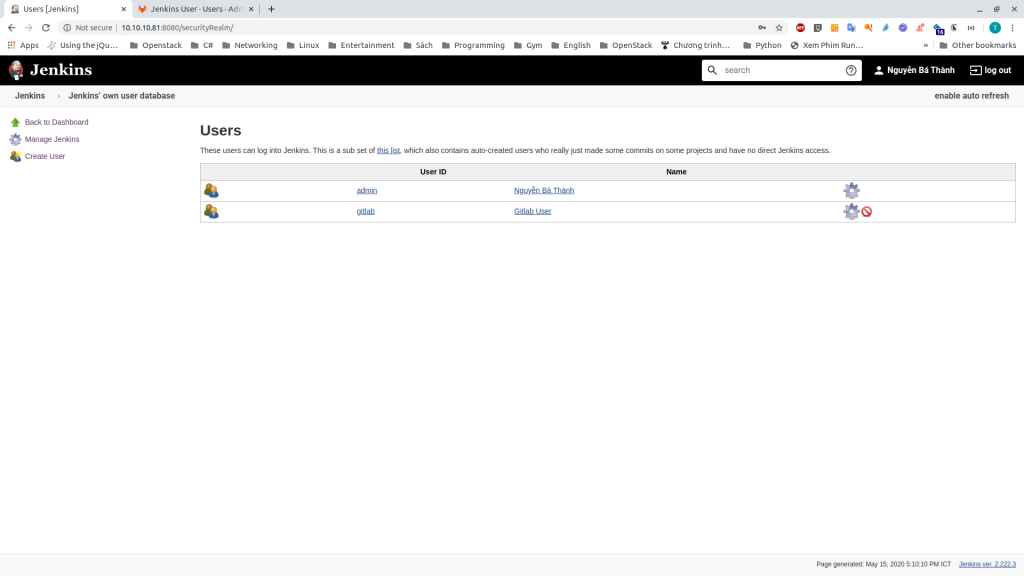
Phần 3: Tạo mới User Gitlab trên Jenkins
Lưu ý: Thực hiện trên node Jenkins, đăng nhập tài khoản Admin
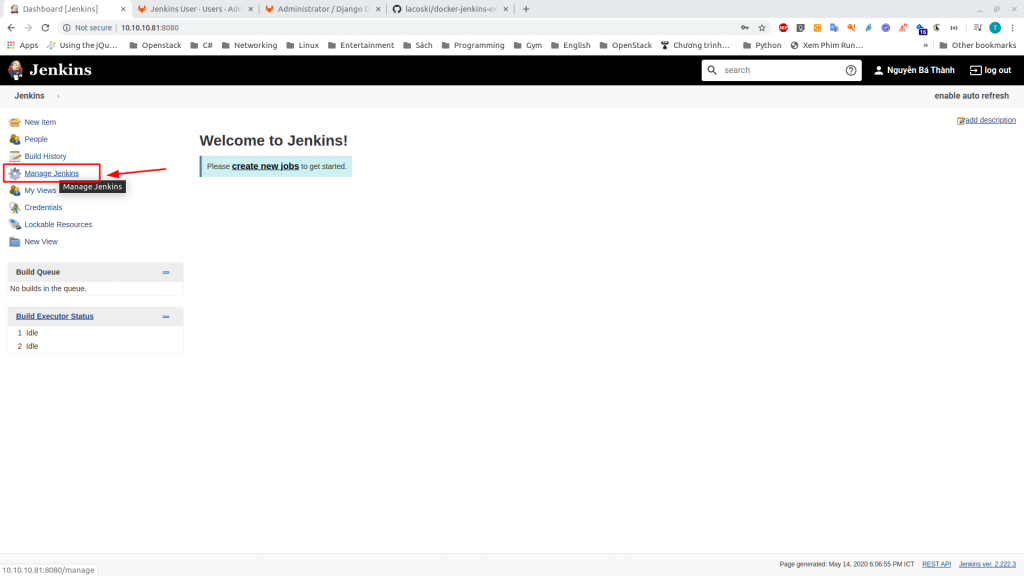
Bước 1: Chọn Manage Jenkins
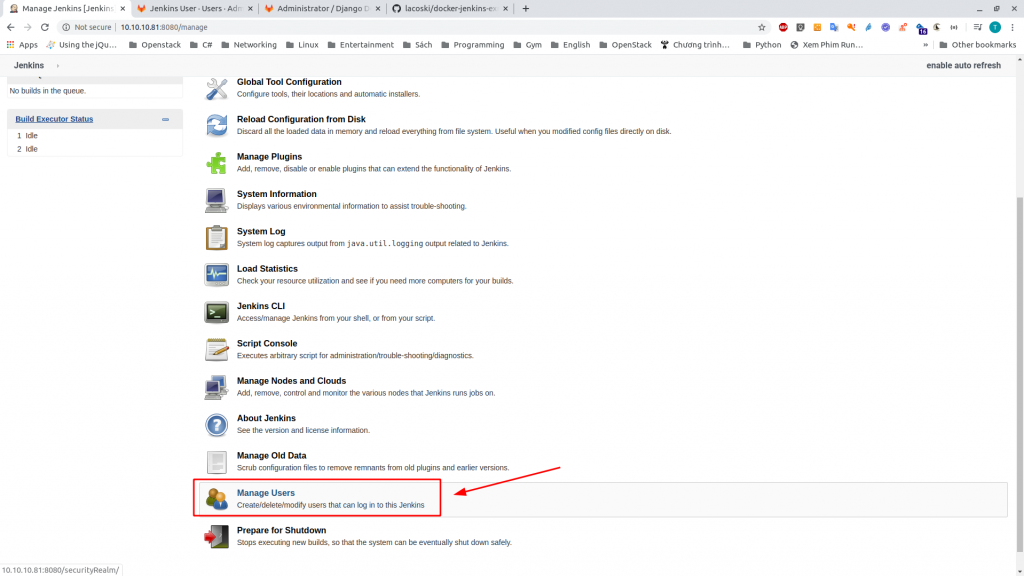
Bước 2: Chọn Manage Users
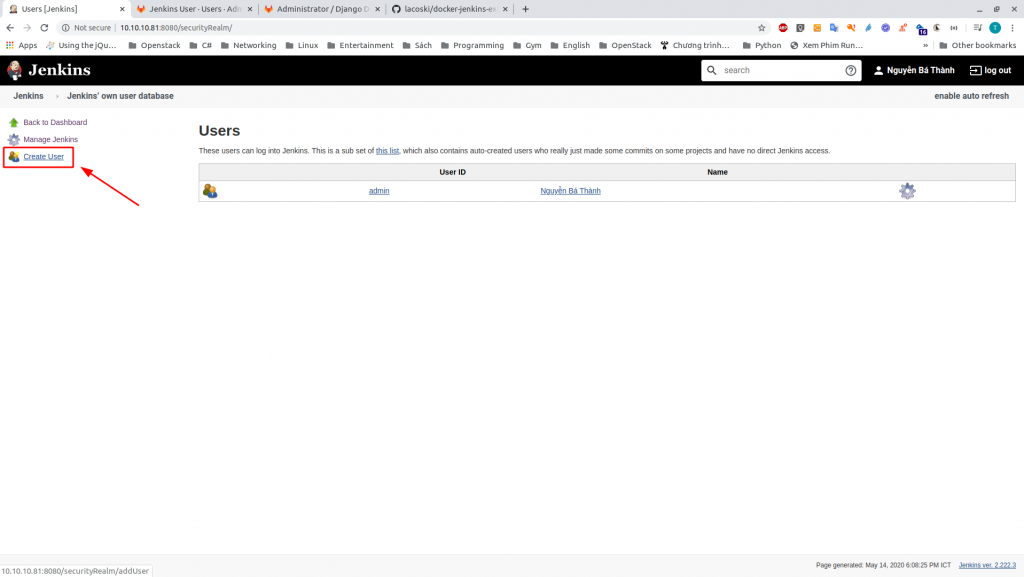
Bước 3: Chọn Create User
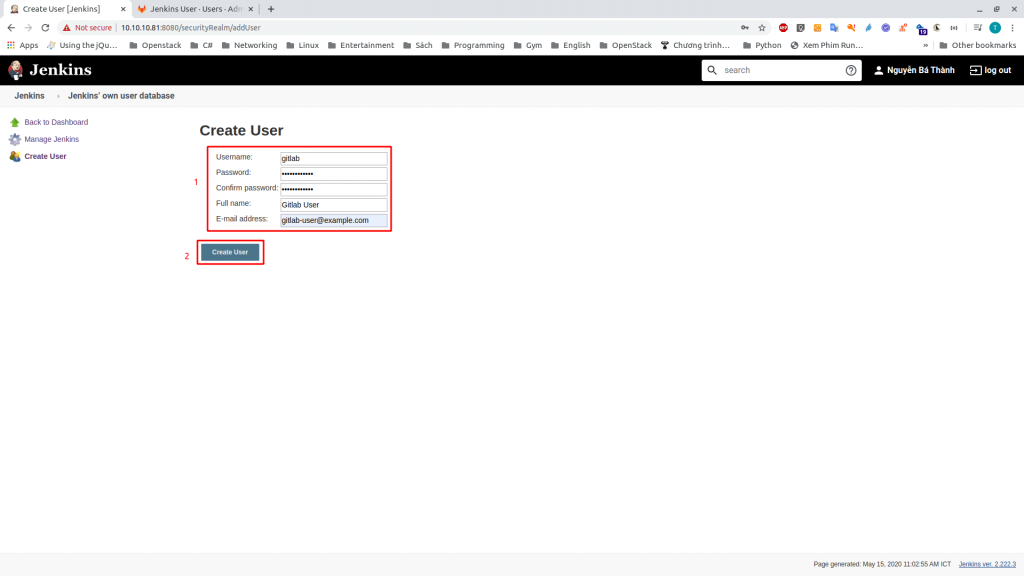
Bước 4: Nhập thông User và khởi tạo
- Nhập
User: gitlab - Nhập
Password: XXXX - Nhập
Confirm password: XXXX - Nhập
Full name: Gitlab User - Nhập
E-mail address: gitlab-user@example.com - Chọn
Create Usersau khi nhập liệu xong
Kết quả
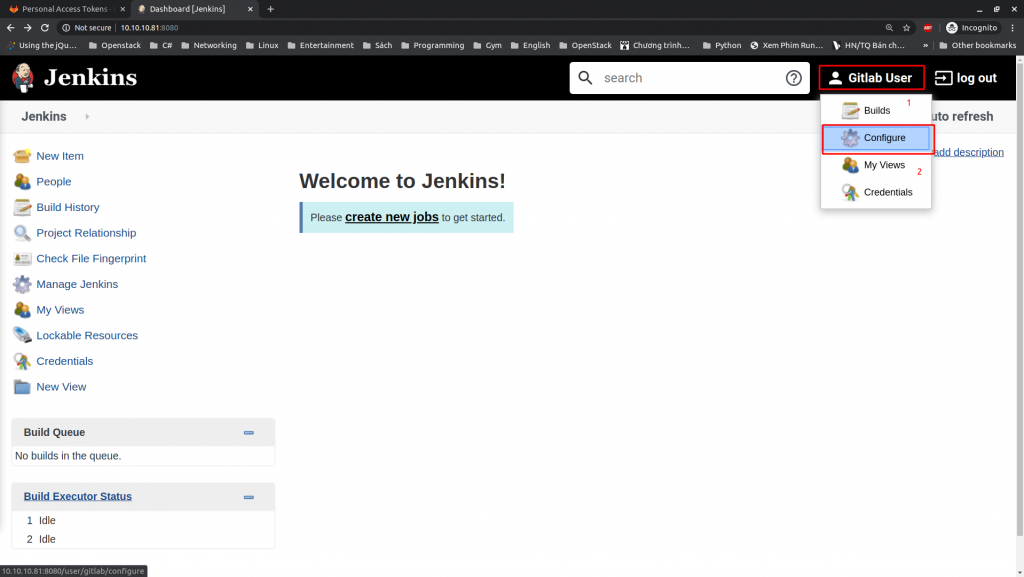
Phần 4: Thiết lập User Gitlab trên Jenkins
Lưu ý: Thực hiện trên node Jenkins, Mở trình ẩn danh
Truy cập đường dẫn http://10.10.10.81:8080
Bước 1: Đăng nhập tài khoản gitlab vừa tạo

Bước 2: Chọn Gitlab User => Configure
Bước 3: Chọn Add new Token
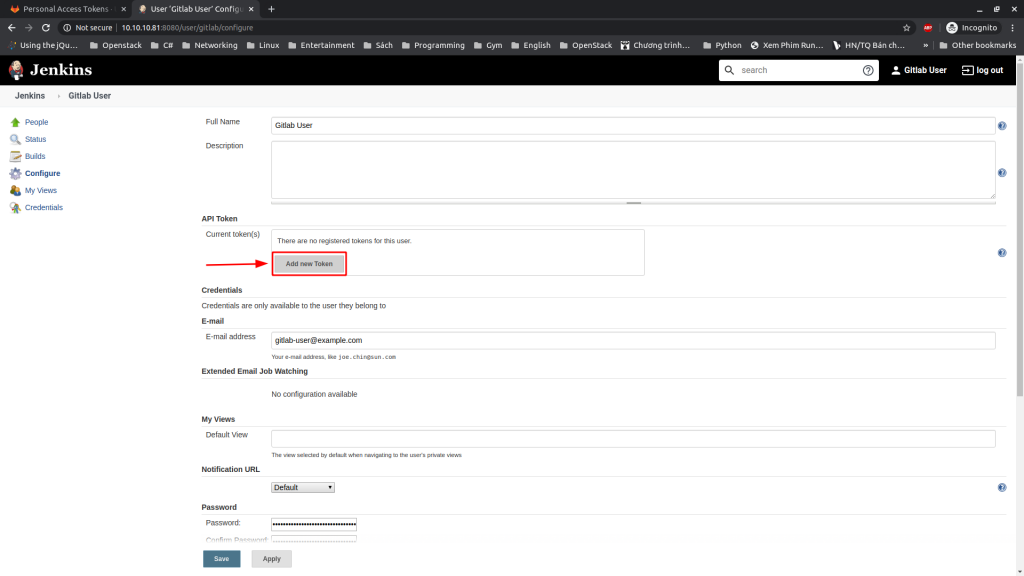
Bước 4: Nhập tên token > Chọn Generate
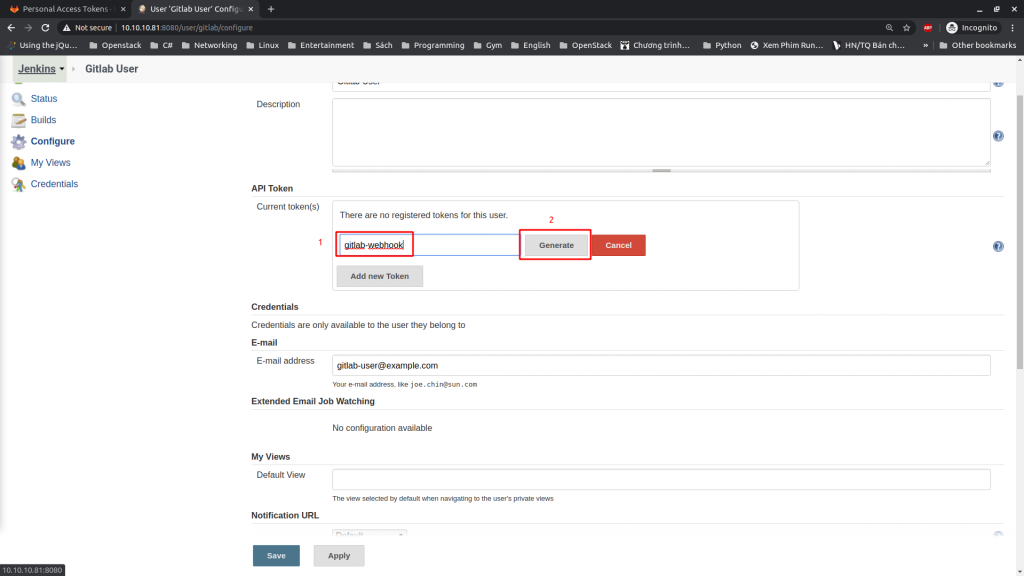
Kết quả
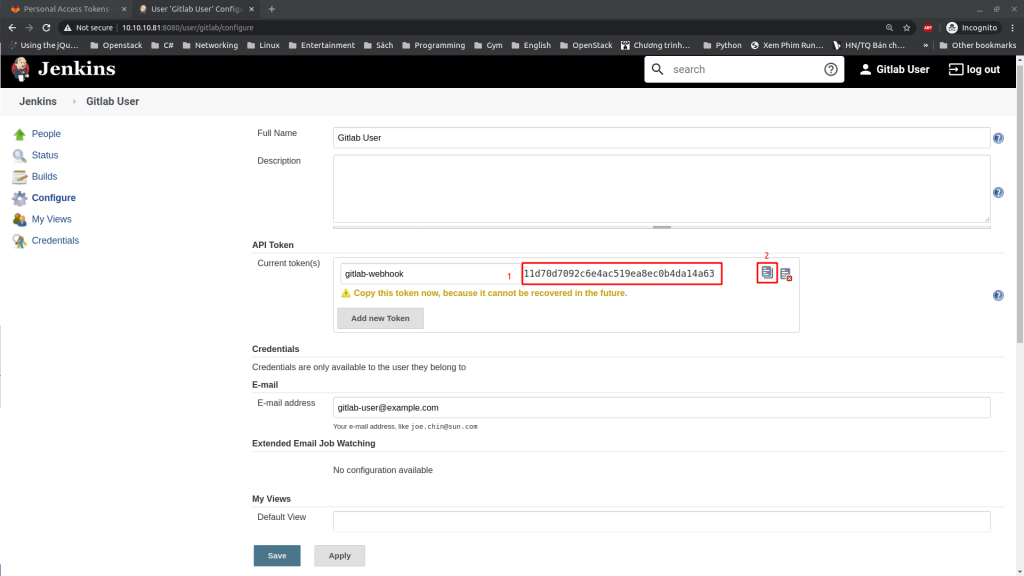
Lưu ý, copy token tới 1 nơi lưu trữ tạm vì ta sẽ cần sử dụng nó, như trong bài, token là 11d70d7092c6e4ac519ea8ec0b4da14a63
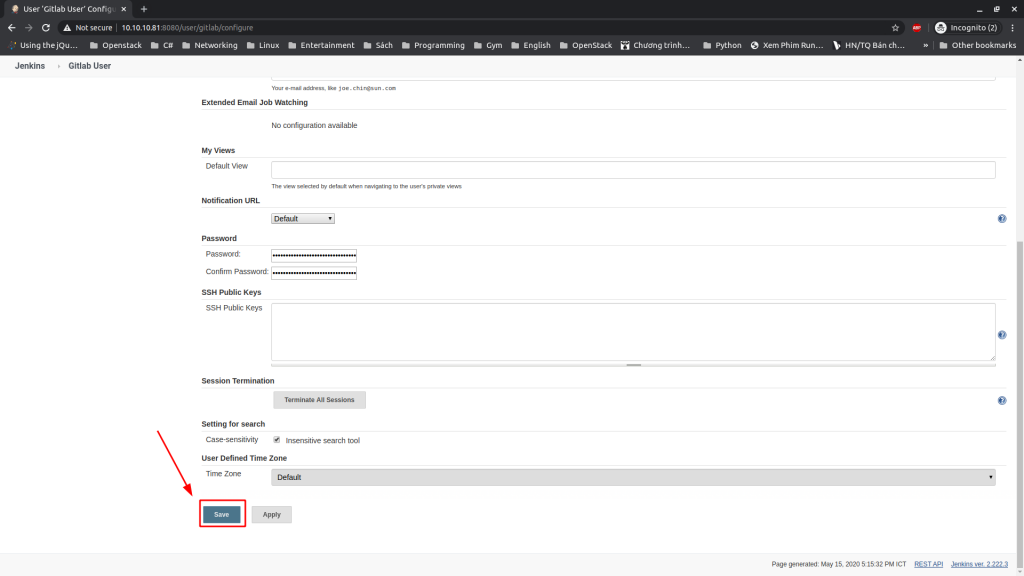
Chọn Save để cập nhật thông tin
Kết quả
Phần 4: Cài đặt Plugin Gitlab cho Jenkins
Lưu ý: Thực hiện trên node Jenkins
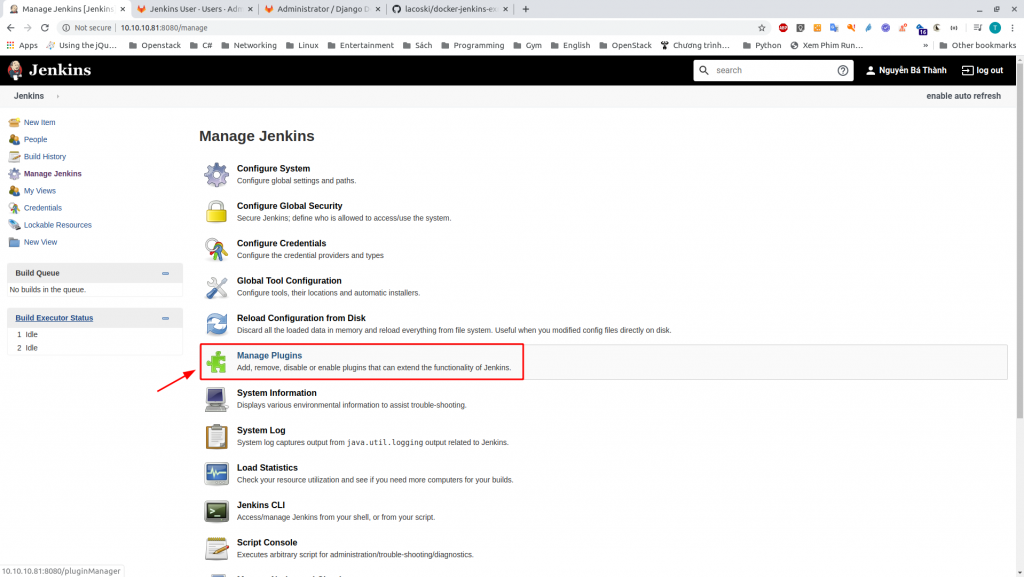
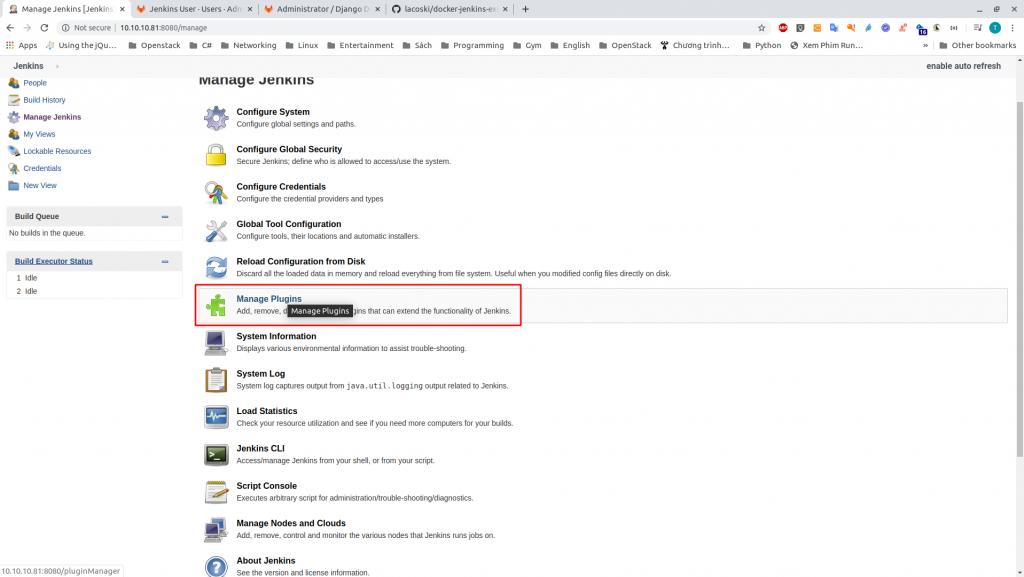
Bước 1: Chọn Manage Jenkins
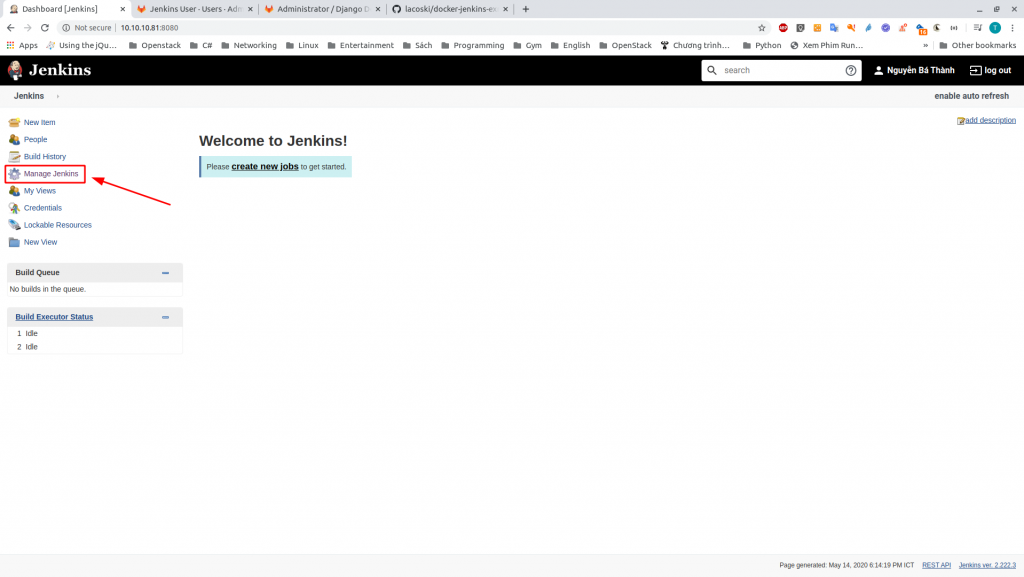
Bước 2: Chọn Manage Plugins
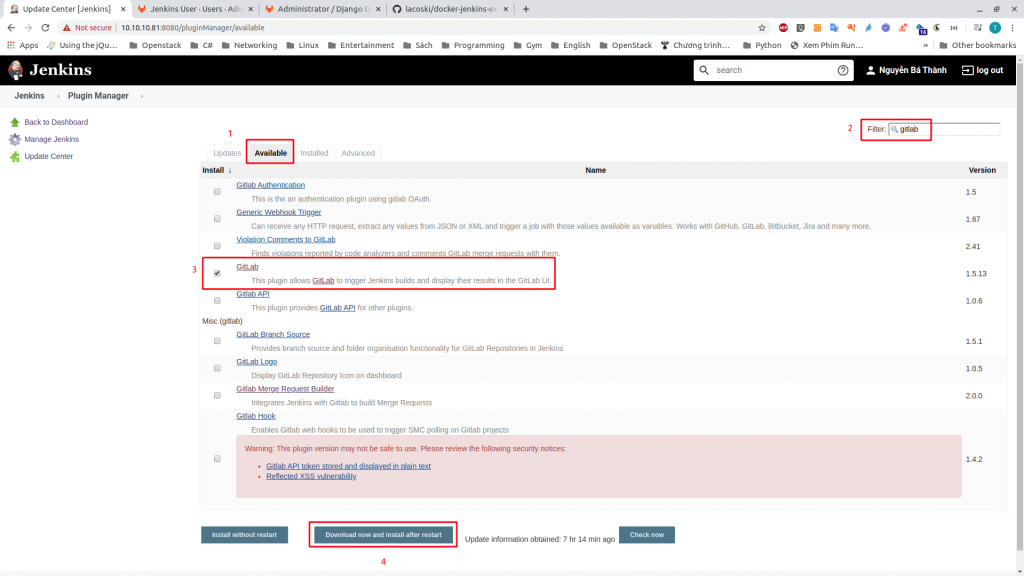
Bước 3: Cài đặt Plugin Gitlab
- Chọn
Available - Nhập
gitlabvà ô Filter - Chọn
GitLab - Chọn
Download now and install after restart
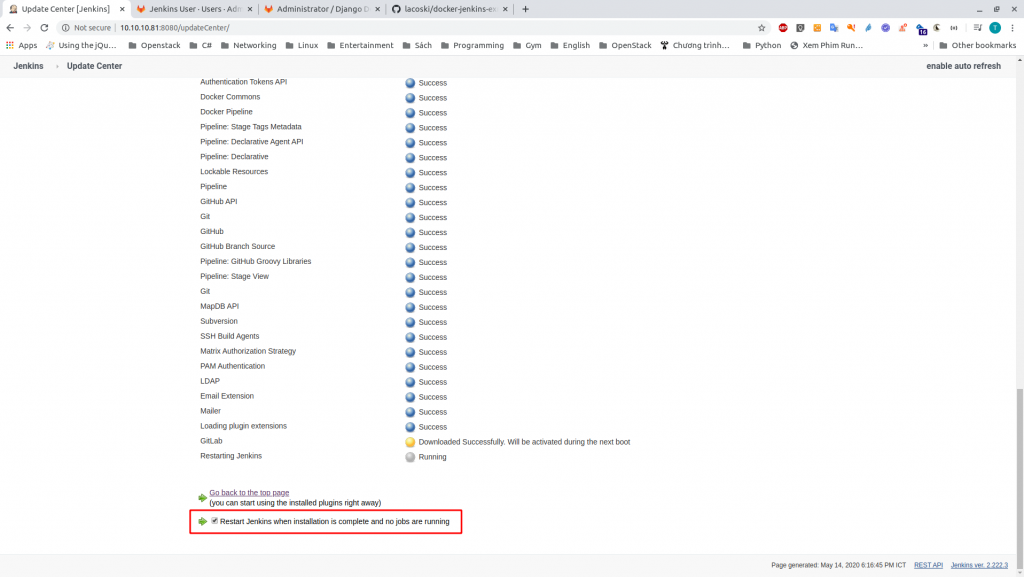
Bước 4: Đợi Plugin cài đặt
Lưu ý:
- Đợi tới khi Gitlab có thông báo
Download Successfully. Will be activated during next boot - Sau khi có thông báo truy cập vào SSH node Jenkins, khởi động dịch Jenkins = câu lệnh
systemctl restart jenkins - Lưu ý, do vấn đề phiên nên đôi khi cài đặt xong plugin rồi nhưng Jenkins không cập nhật lại trên giao diện, sau khi đợi 5 – 10 phút không thấy phản hồi thực hiện bước kiểm tra. Nếu chưa thấy plugin thì lặp lại bước này.
Kiểm tra lại
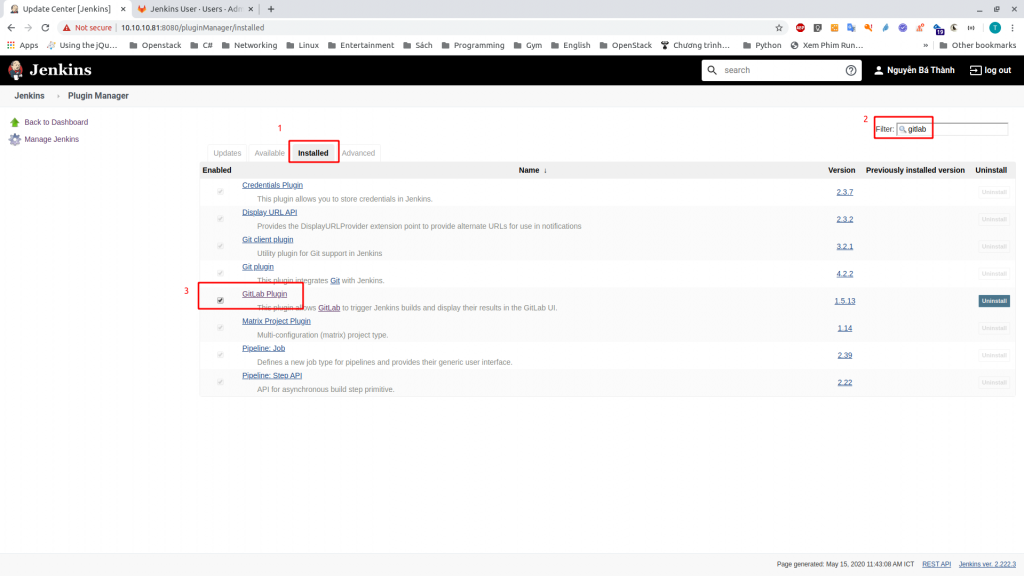
Bước 1: Chọn Manage Jenkins
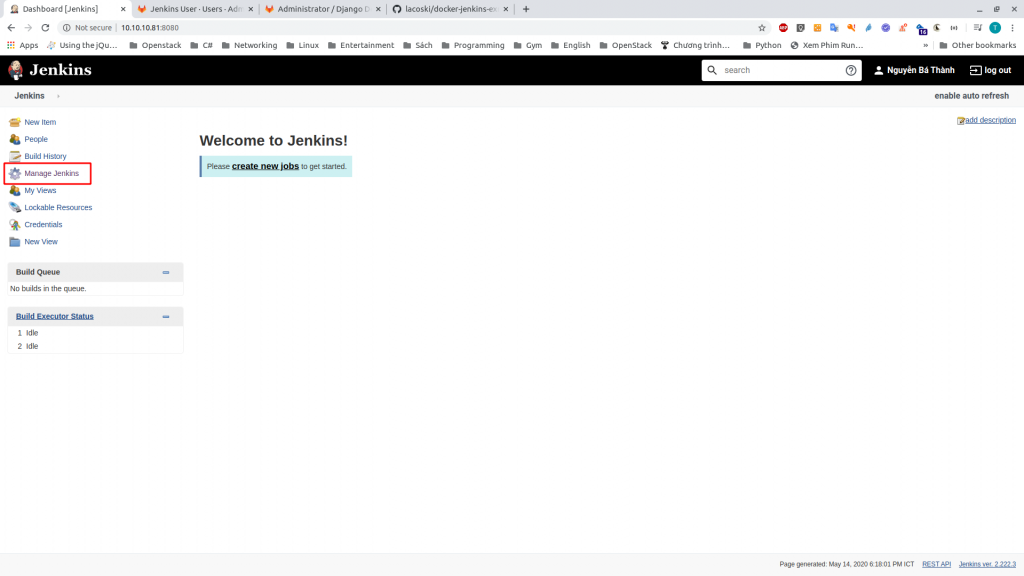
Bước 2: Chọn Manage Plugins
Bước 4: Kiểm tra các Plugin đã cài đặt
- Chọn
Installted - Nhập
gitlabvà ô Filter - Kiểm tra Plugin
GitLabcó tồn tại
Phần 5: Cấu hình Credential
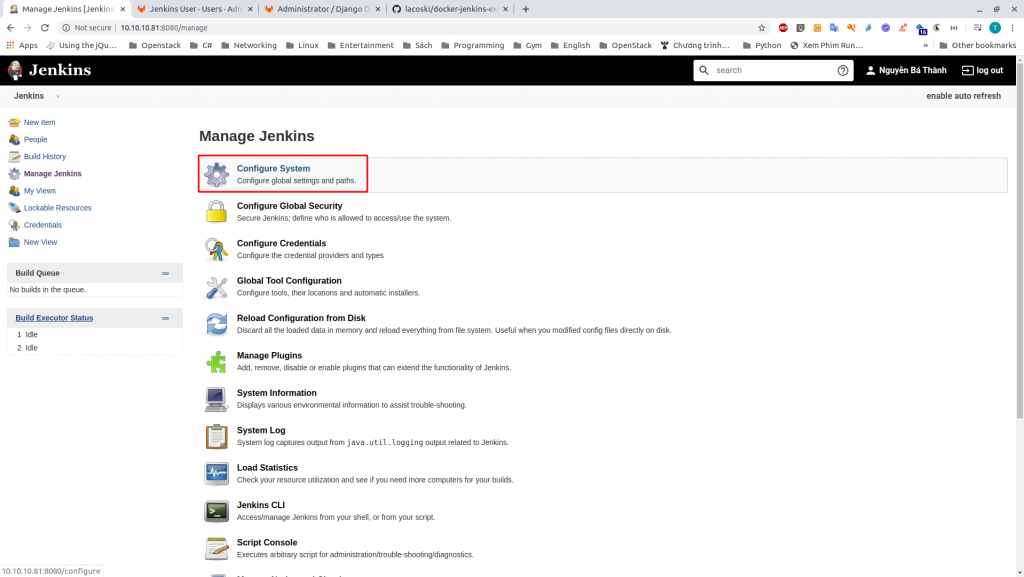
Bước 1: Chọn Manage Jenkins
Bước 2: Chọn Configure System
Bước 3: Cấu hình Gitlab Plugins
- Nhập cấu hình Gitlab
- Giá trị
Connection name: My Gitlab Connection - Giá trị
Gitlab host URL: http://10.10.10.85, lưu ý đây chính là đường dẫn tới địa chỉ của Gitlab
- Giá trị
- Chọn
Add - Chọn
Jenkins
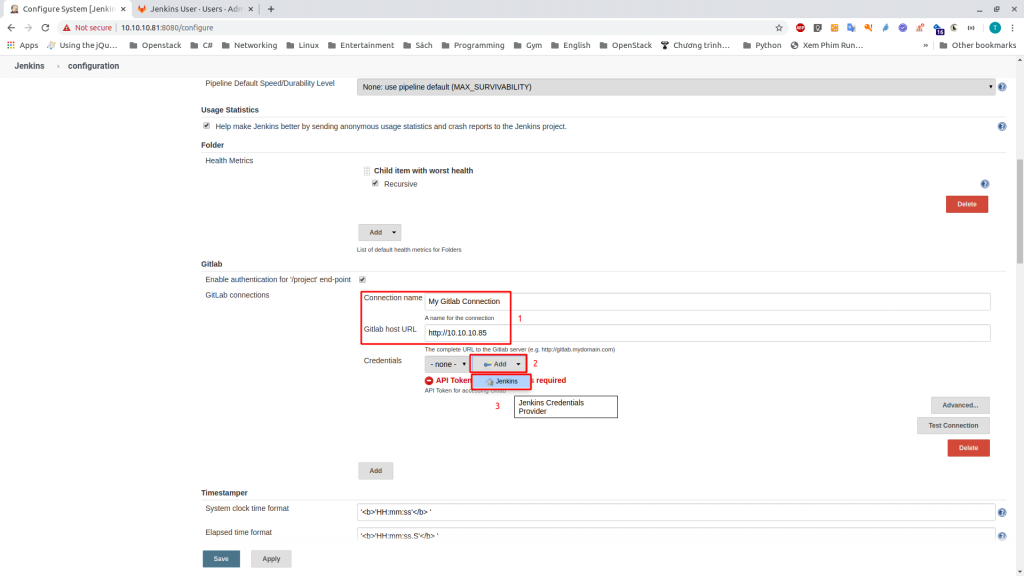
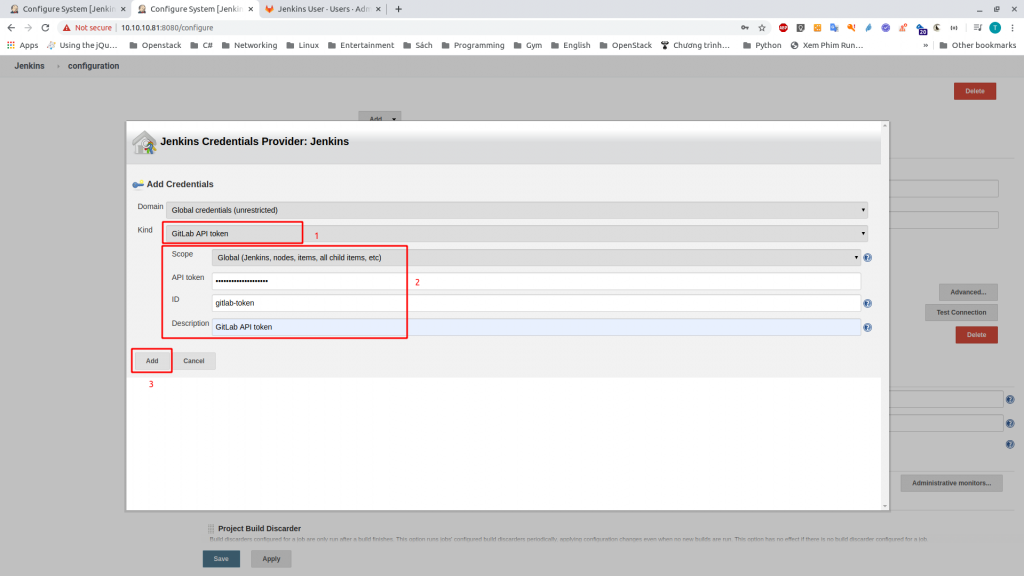
Bước 4: Khái báo Credentials Gitlab mới
- Tại Kind: Chọn
GitLab API token - Nhập các giá trị
- API token:
d4fDkuNmQ71CExBSymRf, lưu ý giá trị này có được từ bước sinh API Token Gitlab - ID:
gitlab-token - Description:
GitLab API Token
- API token:
- Chọn
Addsau khi nhập thông tin xong
Bước 5: Cấu hình Credentials tại Plugin Gitlab
- Chọn Credentials chọn
GitLab API token (GitLab API token) - Chọn
Test Connection - Nếu thành công sẽ nhìn thấy thông báo success tại số 3

Bước 6: Chọn Save để lưu cấu hình

Kết quả
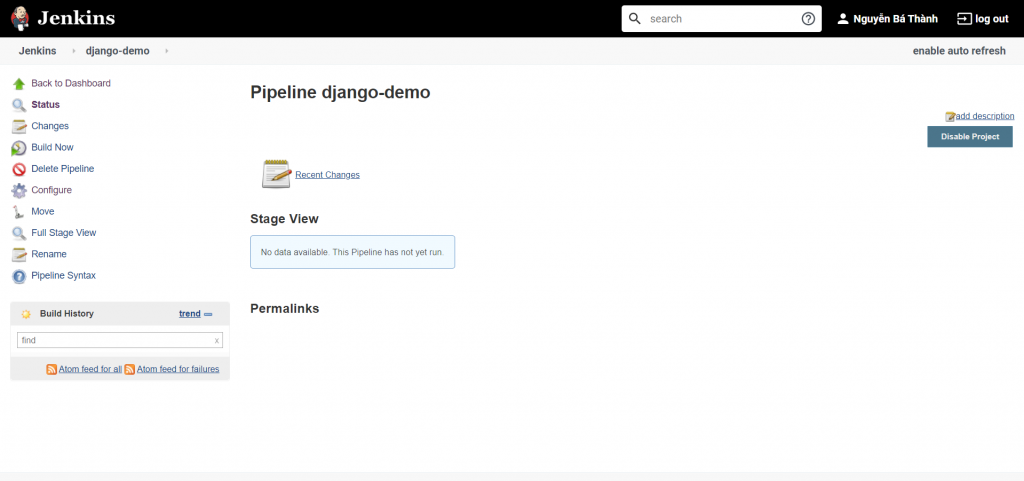
Phần 5: Tạo Pipe
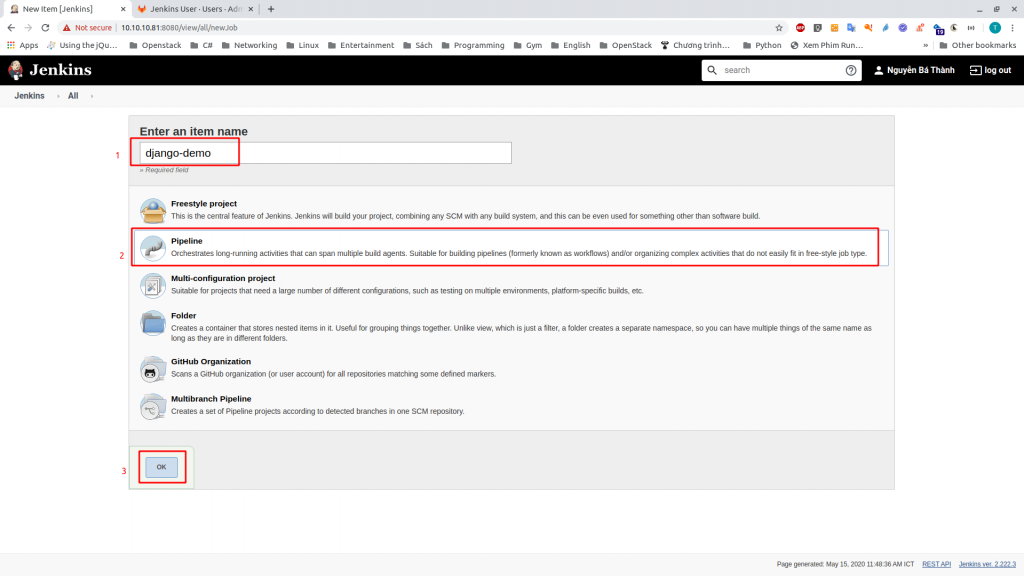
Bước 1: Chọn New item
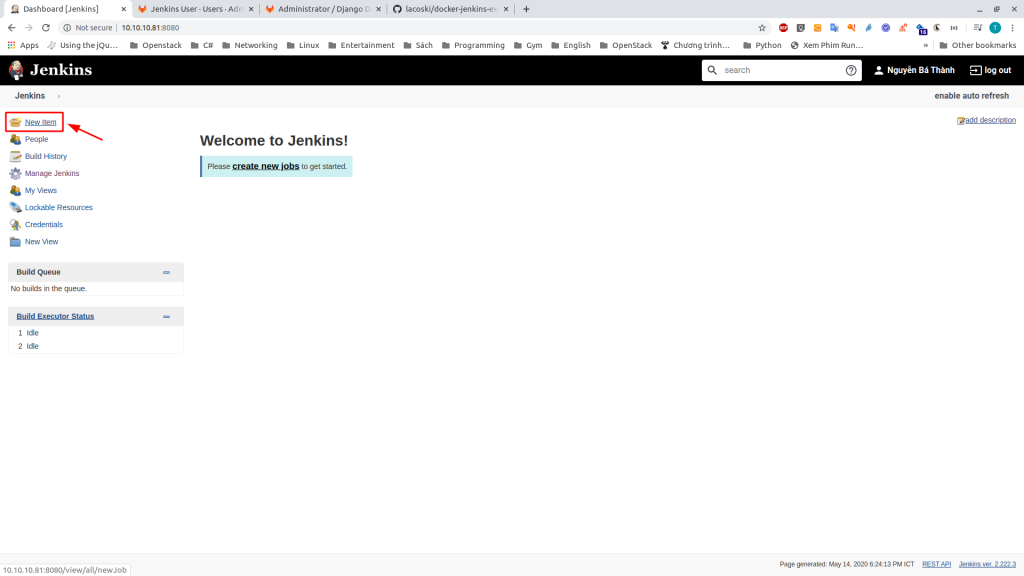
Bước 2: Nhập thông tin khởi tạo Pipeline
- Nhập
Enter an item name: django-demo - Chọn loại
Pipeline - Chọn
Ok
Bước 3: Cấu hình mục General
Cấu hình Discard old builds
- Tính năng chỉ định số bản build sẽ giữ lại, trong bài cấu hình giữ 5 bản gần nhất
- Chọn
Discard old builds - Nhập
Max # of builds to keep: 5
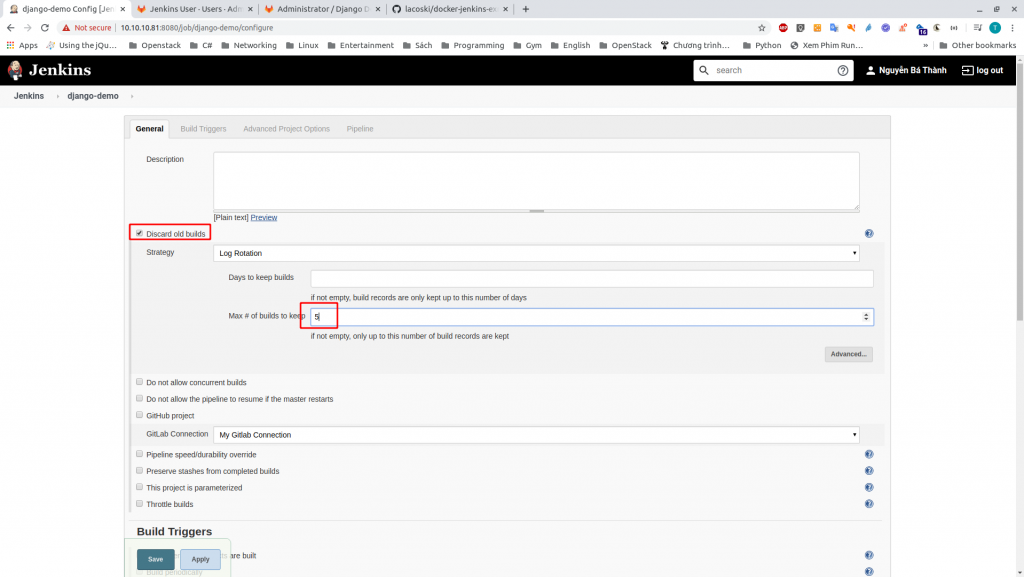
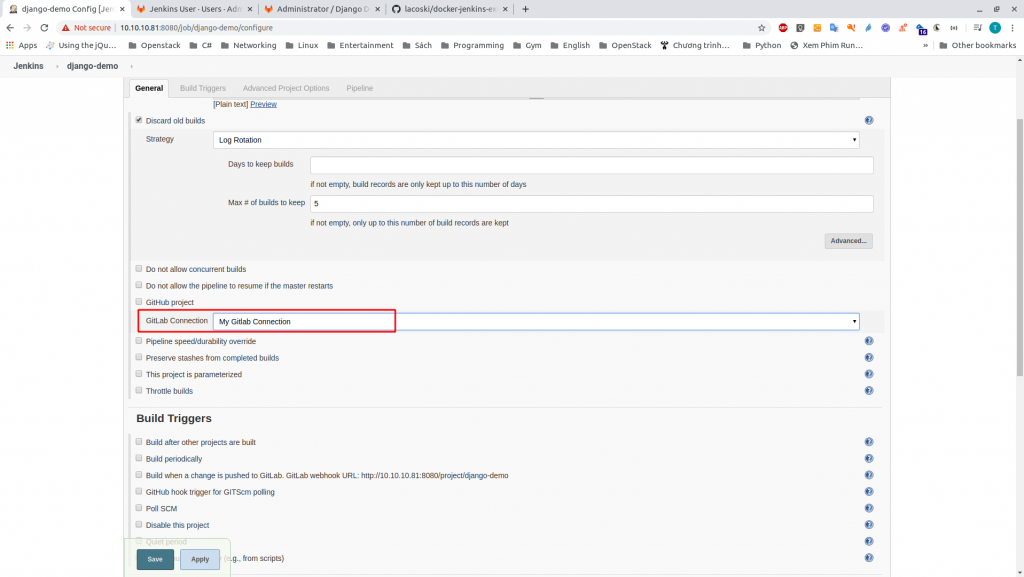
Cấu hình GitLab Connection
- Bảo đảm có kết nối My Gitlab Connection
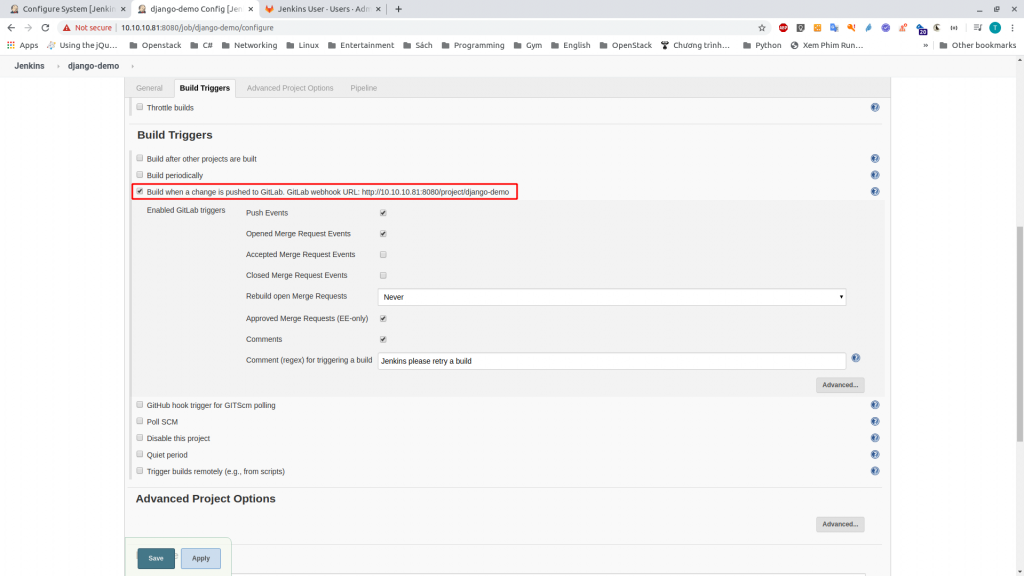
Bước 4: Cấu hình Build Triggers
- Chọn giá trị
Build when a change is pushed to Gitlab. GitLab webhook URL ...
Bước 5: Cấu hình mục Pipeline
Khai báo cấu hình
- Tại
Definition, chọnPipeline script from SCM SCMchọnGit- Tại
Repositories>Repository URLnhậphttp://10.10.10.85/root/django-demo.git. Lưu ý giá trị này có được từ bước trên - Tại
Credentials, chọnAdd>Jenkins
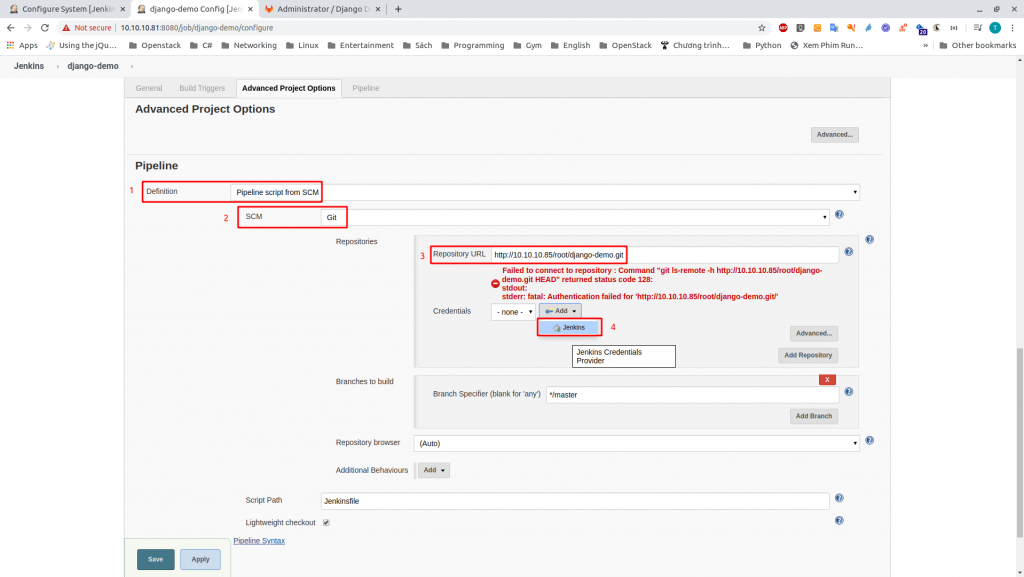
Tại Jenkins Creadentials Provider: Jenkins
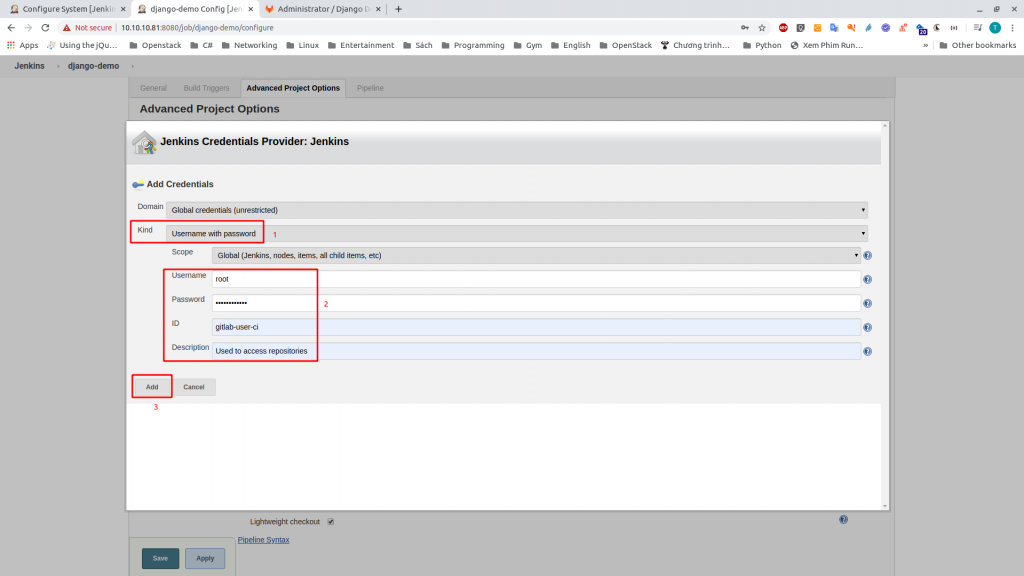
- Tại Kind chọn
Username with password - Nhận thông tin User
- Ở đây sẽ sử dụng tài khoản
rootcủa Gitlab, đây là tài khoản có quyền access các thư mục code ID: gitlab-user-ciDescription: Used to access repositories
- Ở đây sẽ sử dụng tài khoản
- Chọn
Add
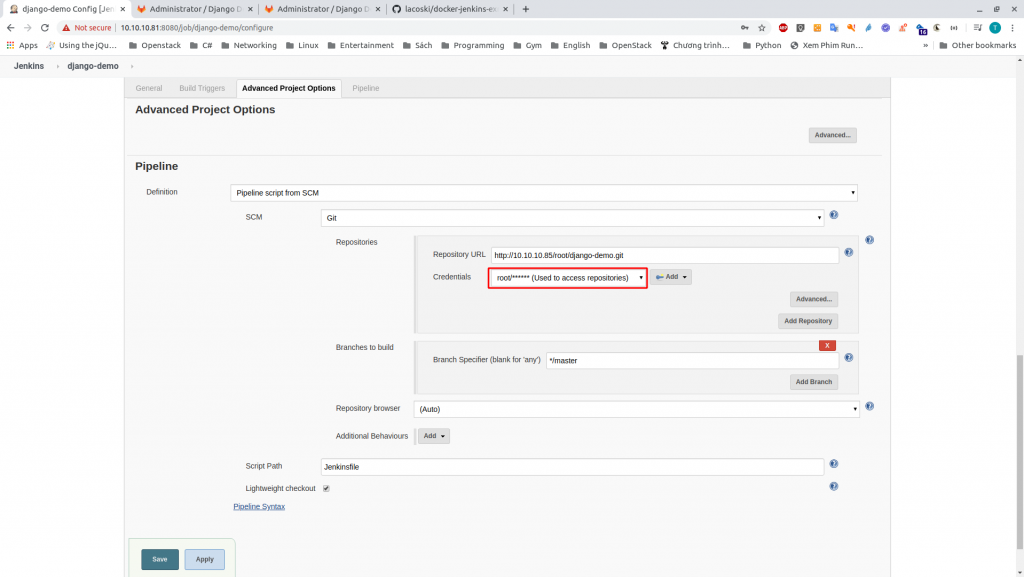
Tại Credentials
- chọn
root/**** (Used to access repositories) - Nếu cấu hình thành công, cảnh báo màu đỏ sẽ biến mất
Bước 6: Chọn Save để lưu lại cấu hình
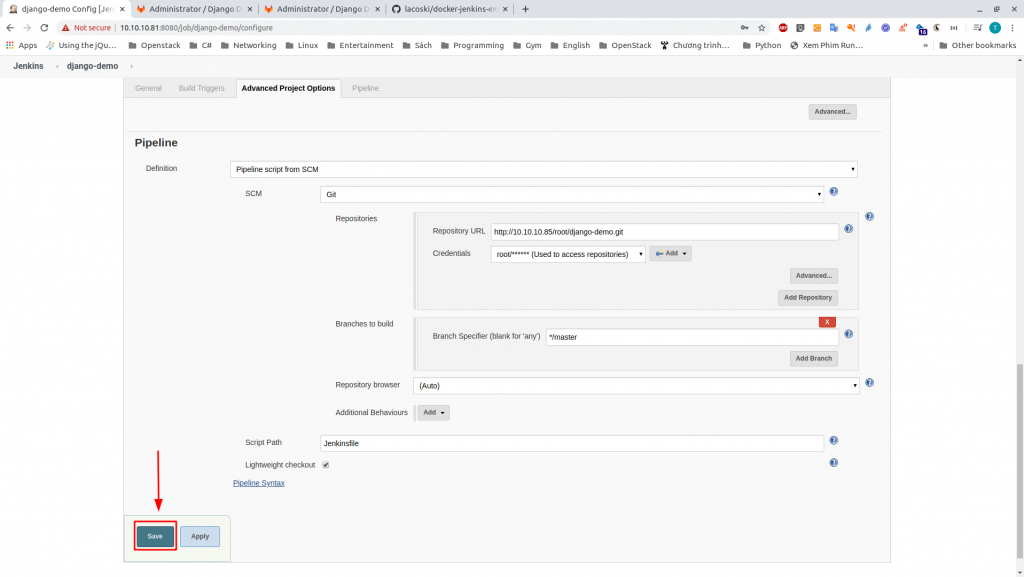
Kết quả
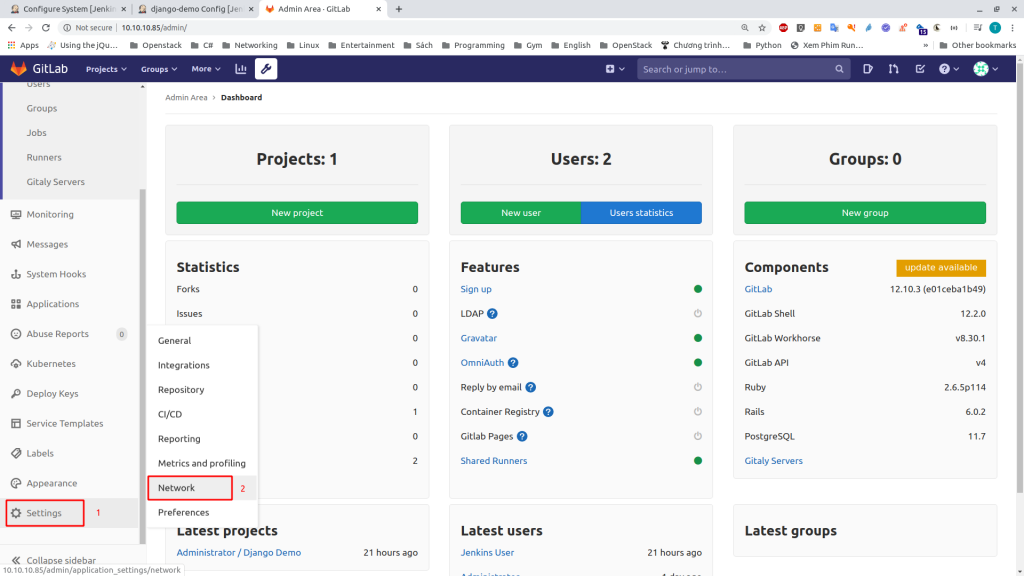
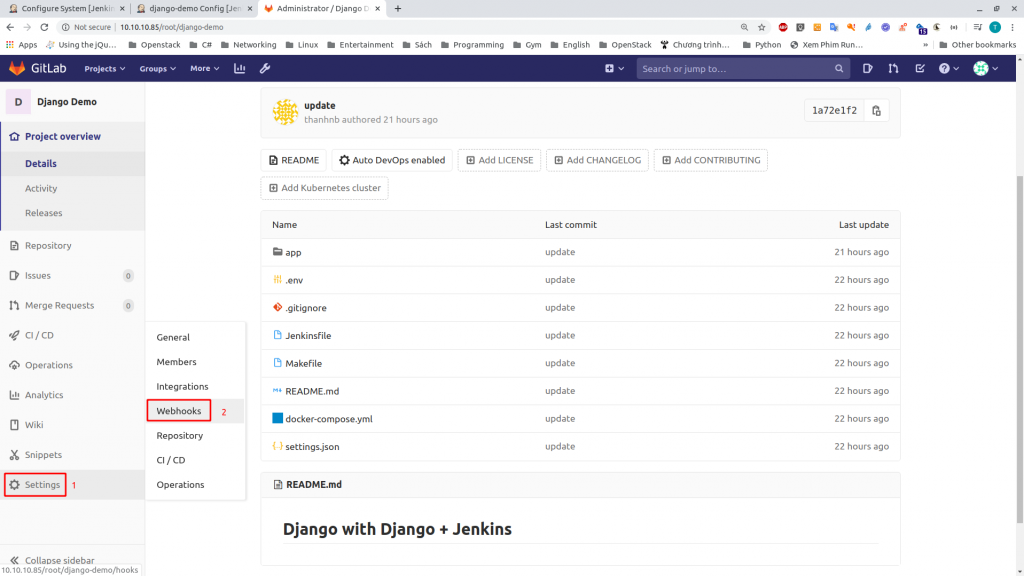
Phần 6: Cấu hình Webhook Gitlab
Bước 1: Cho phép Gitlab có thể gửi Hook ra ngoài mạng
Chọn Admin Area
Chọn 1. Settings > 2. Network
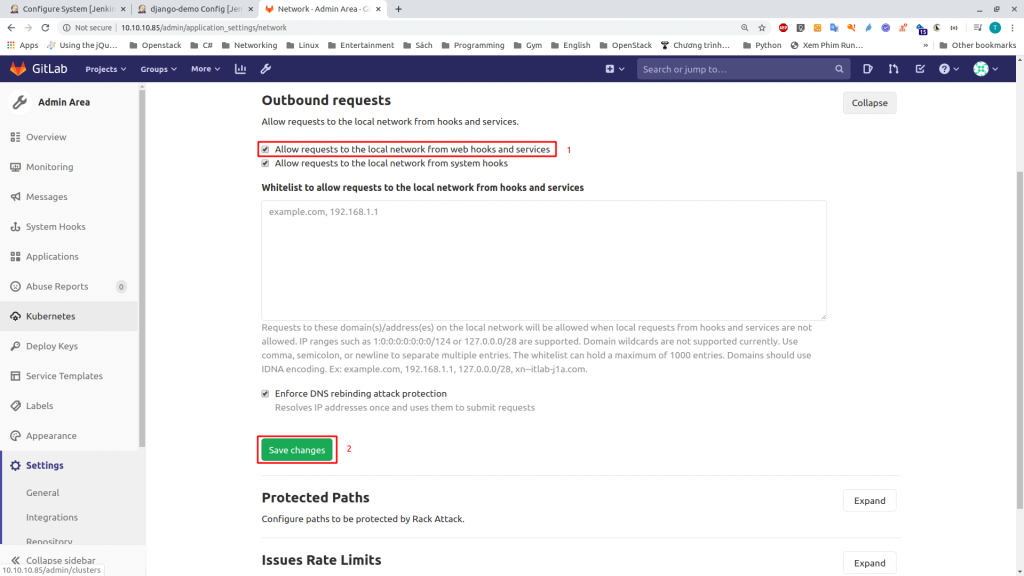
Tại mục Outbound requests
- Chọn
Allow requests to the local network .. - Save Changes
Bước 2: Cấu hình Web hook cho repo
Về trang chủ, chọn Repo Django Demo
Chọn 1. Settings > 2. Webhooks
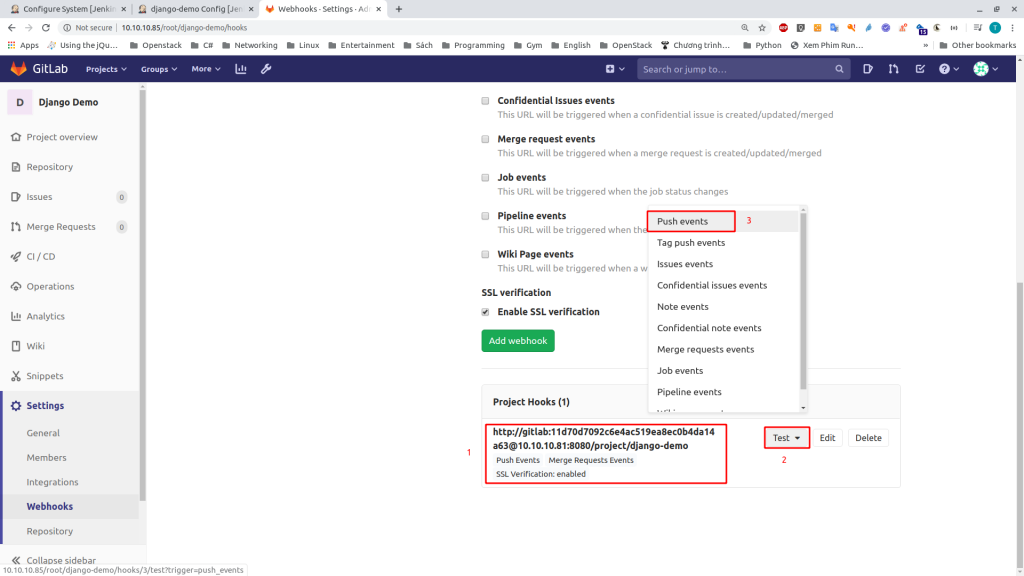
Lưu ý:
- URL Webhook sẽ có dạng
http://<gitlab-user-in-jenkins>:<token>@<host>:<port>/project/<project-name> - Giá trị Token có được từ bước tạo tài khoản gitlab trên Jenkins
11d70d7092c6e4ac519ea8ec0b4da14a63 - Tại 1, nhập URL Webhook theo format
- Tại 2 và 3, chọn
Push eventsvàMerge request events
VD, URL Webhook theo bài:
http://gitlab:11d70d7092c6e4ac519ea8ec0b4da14a63@10.10.10.81:8080/project/django-demo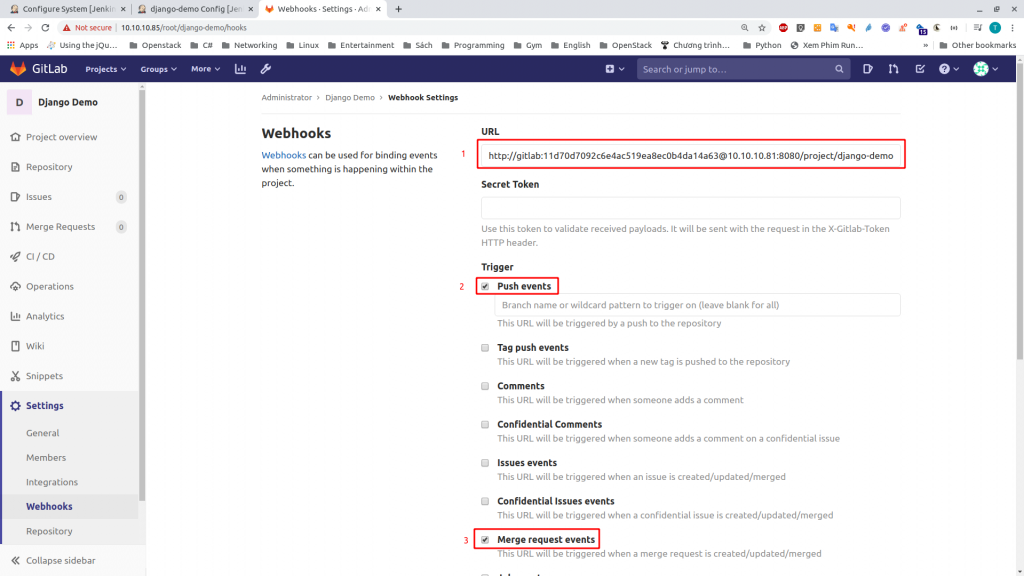
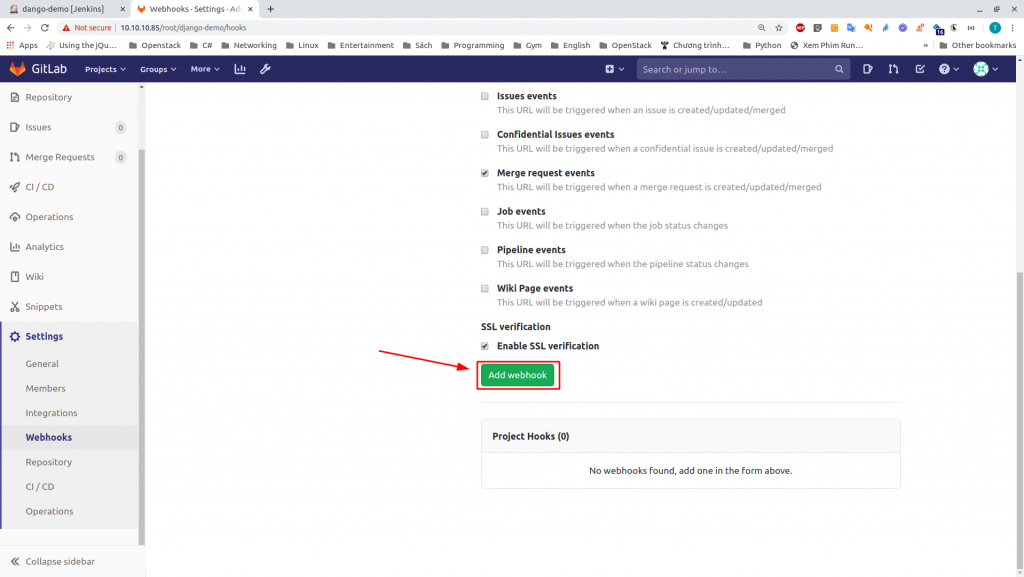
Chọn Add webhook
Bước 3: Push Trigger mẫu tới Jenkins
Tạo Trigger mẫu
- Tại mục
Webhookvừa thêm - Chọn
Test - Chọn
Push events
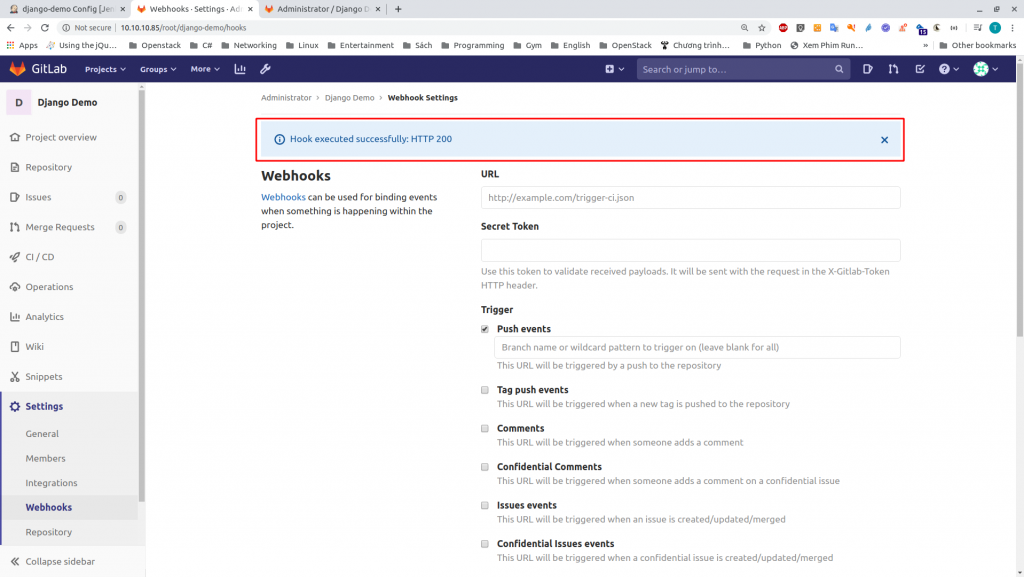
Nếu thành công sẽ có thông báo sau
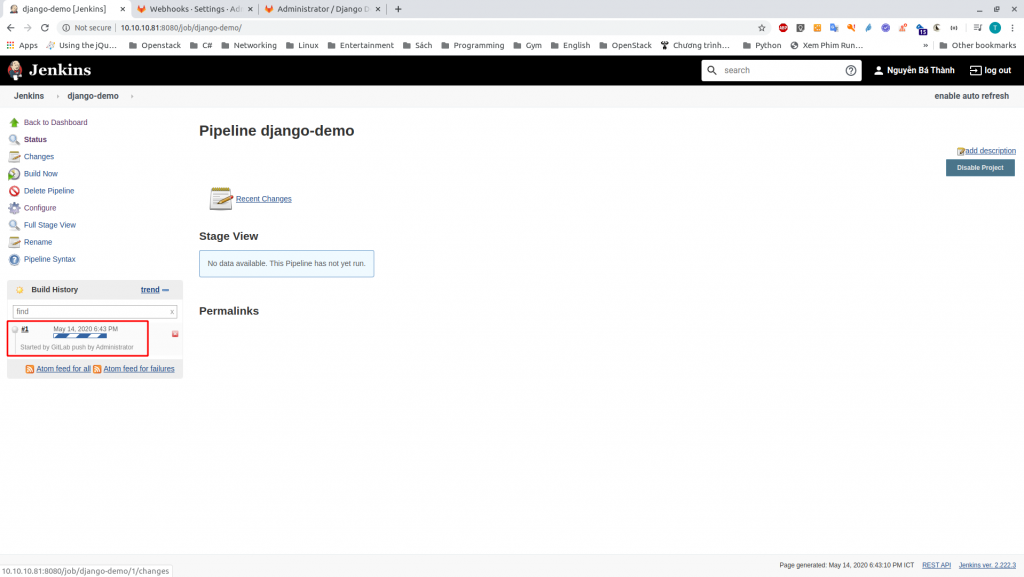
Trở lại Pineline tại Jenkins
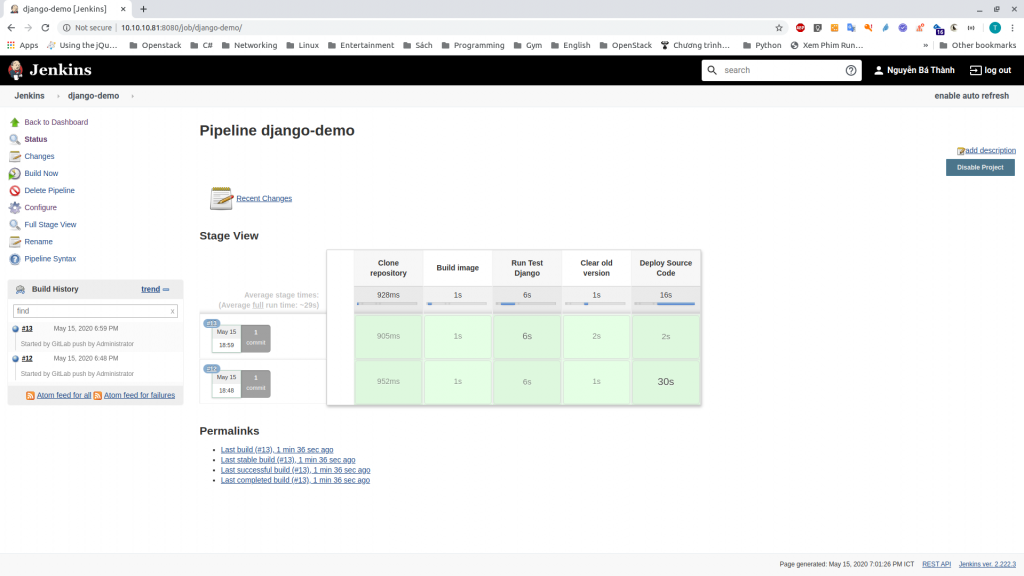
Một số hình ảnh bổ sung
Tới đây mình đã hoàn thành bài hướng dẫn tích hợp Gitlab với Jenkins. Chúc các bạn thành công.
Tham khảo
Nguồn
https://levelup.gitconnected.com/jenkins-pipeline-with-gitlab-for-java-projects-d2e10c08e255
Leave a Reply