
Công việc cài đặt hệ điều hành là một công việc mà dân IT hay nói đây là điều kiện “nhập môn” của những ai muốn theo ngành này. Chúng ta có thể cài đặt từ CDROM, USB, hay bất kì một bộ boot nào đó. Tuy nhiên những việc này sẽ rất mất thời gian và lặp đi lặp lại Thay vì phải sử dụng CDROM, USB boot hay file ISO để cài đặt hệ điều hành, chúng ta có thể sử dụng cobbler để boot hệ điều hành qua network từ một server tập chung đã có sẵn file để boot.
Nghe không có gì đặc biệt nhưng cobbler thực sự là một công cụ rất mạnh mẽ để tự động hóa việc cài đặt hệ điều hành, tăng năng suất làm việc.
Trong bài hướng dẫn này, cloud365 sẽ hướng dẫn các bạn sử dụng cobbler để boot một server chạy Ubuntu16.04.
Điều kiện để thực hiện được là các bạn đã có 1 cobbler server. Nếu các bạn chưa biết cài đặt cobbler server có thể tham khảo tại đây
Mục lục:
- Mô hình triển khai
- Import hệ điều hành Ubuntu 16.04
- Tạo file kickstart trên Cobbler server
- Client boot Ubuntu từ Cobbler
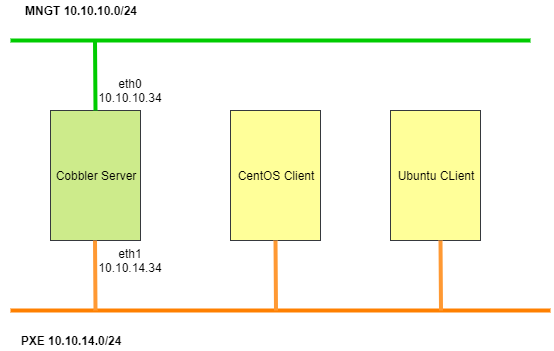
1. Mô hình triển khai
2. Import hệ điều hành Ubuntu 16.04
Thực hiện trên Cobbler Server
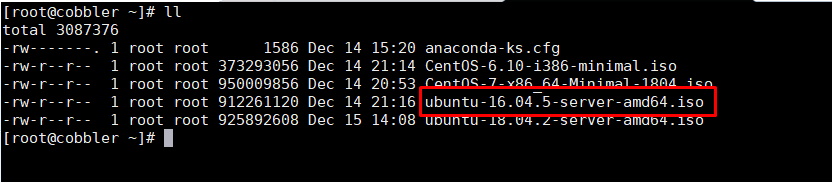
Để import được bộ cài đặt, trước tiên ta phải chuẩn bị sẵn file iso lên cobbler server
Tiếp theo chúng ta tiến hành Import vào cobbler server
Tạo thư mục mount
mkdir /mnt/us16/Mount file iso vào thư mục vừa tạo
mount -o loop ubuntu-16.04.5-server-amd64.iso /mnt/us16Import vào cobbler
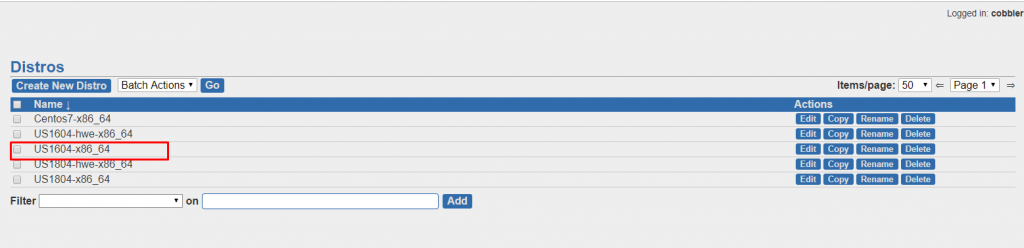
cobbler import --arch=x86_64 --path=/mnt/us16 --name=US1604-x86_64Sau khi import, umount file iso
umount ubuntu-16.04.5-server-amd64.iso /mnt/us16Đăng nhập vào Cobbler server để kiểm tra
Kiểm tra bằng câu lệnh
cobbler distro report --name=US1604-x86_64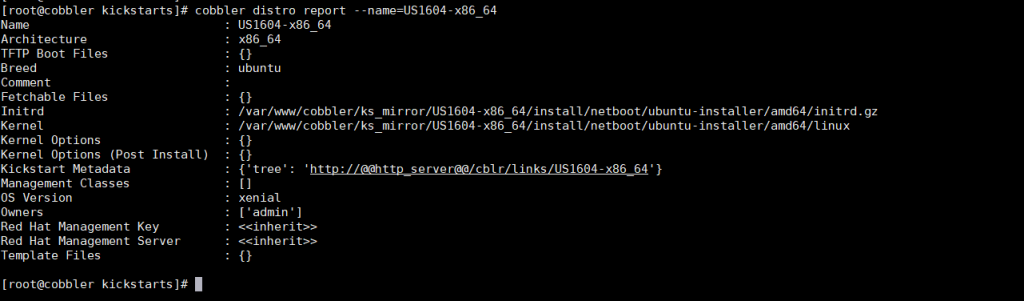
3. Tạo file kickstart trên Cobbler server
Khác với CentOS, định dạng file của Ubuntu là preseed
# Ubuntu Server 16.04 Preseed
# Usage:
# This Ubuntu Preseed file is meant to be used with Cobbler. It has been
# tested only on Cobbler 2.8.2. It is a completely unattended install.
# References:
# https://help.ubuntu.com/14.04/installation-guide/example-preseed.txt
# http://www.claudiokuenzler.com/blog/513/debian-ubuntu-preseed-create-two-volume-groups-same-disk

# Kernel Options

# Use the following option to add additional boot parameters for the
# installed system (if supported by the bootloader installer).
# Note: options passed to the installer will be added automatically.
d-i debian-installer/add-kernel-opts string ksdevice=bootif lang=  biosdevname=0 interface=eth0 text net.ifnames=0

# Networking

d-i netcfg/choose_interface select auto
d-i netcfg/get_hostname string $hostname

# Pre Install

# Command Line 1: This is necessary otherwise you will be prompted to umount /dev/sda. See Ubuntu bug #1347726.
d-i preseed/early_command string \
      umount /media || true

# Net Image

# Required at least for 12.10+
d-i live-installer/net-image string http://10.10.35.13/cobbler/links/US1604-x86_64/install/filesystem.squashfs

# Localization

d-i debian-installer/locale string en
d-i debian-installer/country string US
d-i debian-installer/locale string en_US.UTF-8
d-i debian-installer/language string en

# Keyboard

# Disable automatic (interactive) keymap detection.
d-i console-setup/ask_detect boolean false
d-i console-setup/layoutcode string us
d-i console-setup/variantcode string
d-i keyboard-configuration/layoutcode string us
d-i keyboard-configuration/variantcode string

# Mirror

d-i mirror/country string manual
d-i mirror/http/proxy string
d-i mirror/http/hostname string 10.10.35.13
d-i mirror/http/directory string /cblr/links/US1604-x86_64

# d-i mirror/protocol string http
# d-i mirror/country string manual
# d-i mirror/http/hostname string archive.ubuntu.com
# d-i mirror/http/directory string /ubuntu
# d-i mirror/http/proxy string


# Uncomment this if you don't want to use a network mirror.
# d-i apt-setup/use_mirror boolean true

# Clock and Time Zone

# Controls whether to use NTP to set the clock during the install
d-i clock-setup/ntp boolean true
d-i clock-setup/ntp-server string ntp.ubuntu.com

# You may set this to any valid setting for $TZ; see the contents of
# /usr/share/zoneinfo/ for valid values.
d-i time/zone string Asia/Ho_Chi_Minh
# Controls whether or not the hardware clock is set to UTC.
d-i clock-setup/utc boolean true

# Partitioning

# If one of the disks that are going to be automatically partitioned
# contains an old LVM configuration, the user will normally receive a
# warning. This can be preseeded away...
d-i partman-lvm/device_remove_lvm boolean true

# The same applies to pre-existing software RAID array:
d-i partman-md/device_remove_md boolean true

# And the same goes for the confirmation to write the lvm partitions.
d-i partman-lvm/confirm boolean true
d-i partman-lvm/confirm_nooverwrite boolean true

d-i partman-auto/method string lvm
d-i partman-auto/disk string /dev/[sv]da

# For LVM partitioning, you can select how much of the volume group to use
# for logical volumes.
d-i partman-auto-lvm/guided_size string max

# Disk Partitioning
# Use LVM, and wipe out anything that already exists
d-i partman/choose_partition select finish
d-i partman/confirm boolean true
d-i partman/confirm_nooverwrite boolean true
d-i partman-auto/method string lvm
d-i partman-lvm/device_remove_lvm boolean true
d-i partman-lvm/confirm boolean true
d-i partman-lvm/confirm_nooverwrite boolean true
d-i partman-md/device_remove_md boolean true
d-i partman-partitioning/confirm_write_new_label boolean true
d-i grub-installer/grub2_instead_of_grub_legacy boolean true
d-i grub-installer/only_debian boolean true
d-i grub-installer/bootdev string /dev/[sv]da
d-i debian-installer/quiet boolean false
d-i debian-installer/splash boolean false

# You can choose one of the three predefined partitioning recipes:
# - atomic: all files in one partition
# - home:   separate /home partition
# - multi:  separate /home, /usr, /var, and /tmp partitions
d-i partman-auto/choose_recipe select atomic

# If you just want to change the default filesystem from ext3 to something
# else, you can do that without providing a full recipe.
# d-i partman/default_filesystem string ext4

# Packages

# Package selection
d-i pkgsel/include string openssh-server wget

# Whether to upgrade packages after debootstrap.
# Allowed values: none, safe-upgrade, full-upgrade
d-i pkgsel/upgrade select none

# Policy for applying updates. May be "none" (no automatic updates),
# "unattended-upgrades" (install security updates automatically), or
# "landscape" (manage system with Landscape).
d-i pkgsel/update-policy select none

# Some versions of the installer can report back on what software you have
# installed, and what software you use. The default is not to report back,
# but sending reports helps the project determine what software is most
# popular and include it on CDs.
popularity-contest popularity-contest/participate boolean false

# Users and Password

# Skip creation of a root account (normal user account will be able to
# use sudo). The default is false; preseed this to true if you want to set
# a root password.
d-i passwd/root-login boolean true

# Alternatively, to skip creation of a normal user account.
d-i passwd/make-user boolean false

# The installer will warn about weak passwords. If you are sure you know
# what you're doing and want to override it, uncomment this.
d-i user-setup/allow-password-weak boolean true

# Root password, either in clear text
# d-i passwd/root-password password Welcome123
# d-i passwd/root-password-again password Welcome123

d-i passwd/root-password-crypted password $1$TfMqC/HP$n5MgQOxoYemU/X7UvwjdY0

# Post Install
# Command Line 1: Allow root to SSH.
# Command Line 2,3 : Edit file sources.list
d-i preseed/late_command string \
sed -i '/PermitRootLogin / s/ .*/ yes/' /target/etc/ssh/sshd_config; \
sed -i 's/10.10.35.13/vn.archive.ubuntu.com/g' /target/etc/apt/sources.list; \
sed -i 's|cblr/links/US1604-x86_64|ubuntu|g' /target/etc/apt/sources.list; \
touch /target/root/hello
# Finish

# Reboot after the install is finished.
finish-install finish-install/reboot_in_progress note
Cập nhật và động bộ
#cobbler profile edit --name=US1604-x86_64 --kickstart=/var/lib/cobbler/kickstarts/ubuntu-server-16-04.seed

#cobbler sync
4. Client boot Ubuntu từ Cobbler
Trong bài lab này, cloud 365 sẽ thực hiện boot một VM trên KVM. Ta phải chọn boot từ dải mạng của Cobbler. Theo như mô hình trên là dải mạng 10.10.14.0/24
Giao diện hiển thị cho người dùng như sau:
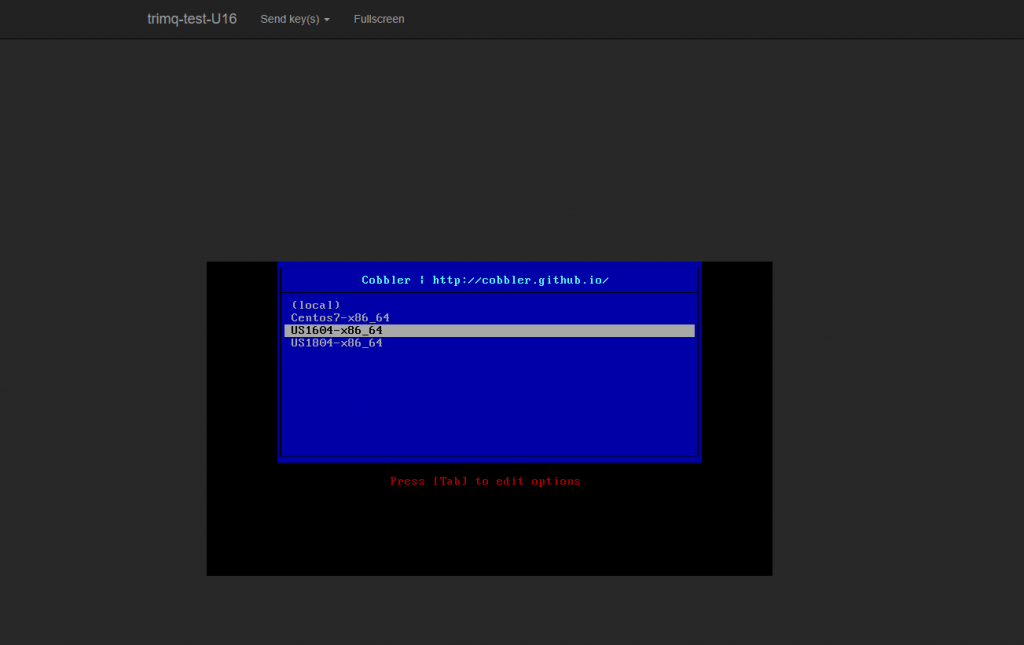
Sau khi boot xong, hệ thống tự động cài đặt OS từ cobbler server
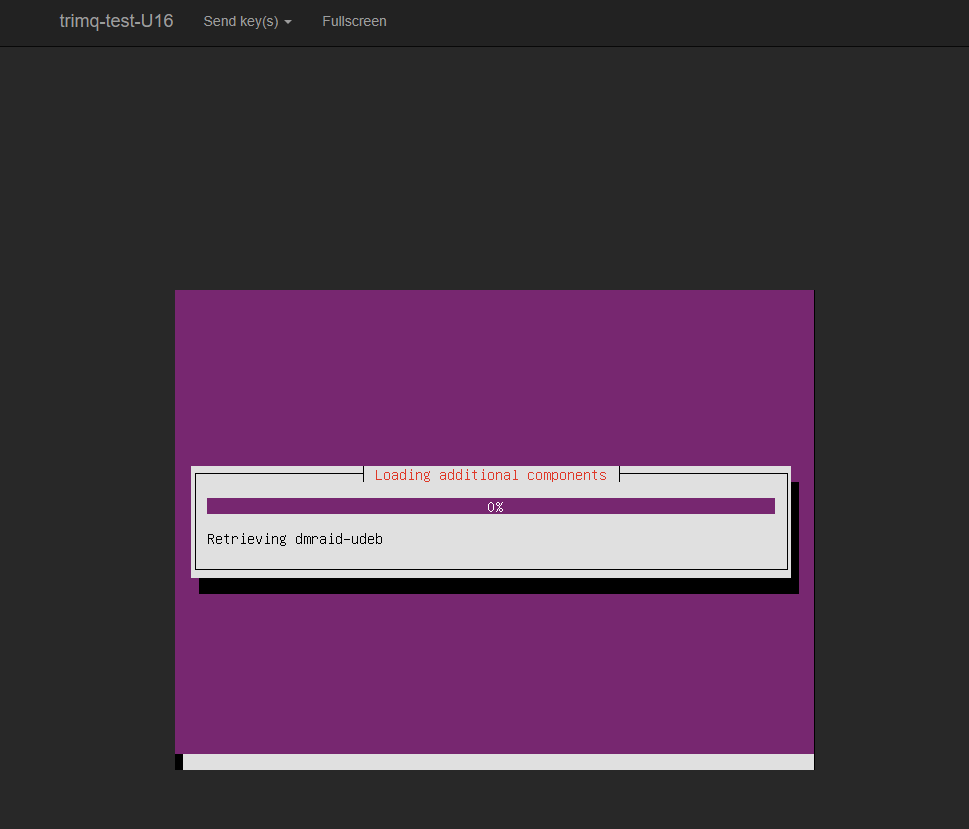
Sau khi chờ OS cài đặt khoảng 10 tới 15’ là bạn đã có một máy chạy OS Ubuntu16 đã được cấu hình cài hệ điều hành hoàn chỉnh.
Leave a Reply