NetBox là một ứng dụng web nguồn mở được thiết kế kế để giúp quản lý hạ tầng mạng máy tính. Ban đầu nó được tạo ra bởi đội ngũ kỹ thuật mạng tại DigitalOcean. Nó được phát triển để giải quyết các nhu cầu của các kỹ sư mạng và hạ tầng. NetBox có thể quản lý được các thành phần sau của hạ tầng mạng :
- Quản lý địa chỉ IP (IPAM) : quản lý địa chỉ mạng, địa chỉ IP, VRF và VLAN
- Giá đỡ thiết bị : được tổ chức lại theo các nhóm
- Thiết bị : các loại thiết bị và vị trí đặt chúng
- Kết nối : Kết nối mạng và kết nối nguồn giữa các thiết bị
- Ảo hóa : các cụm máy ảo
- Mạch dữ liệu : nhà cung cấp và mạch truyền thông đường dài
- Bảo mật : mã hóa những thông tin nhạy cảm
Cài đặt
Bước 1: Cài đặt PostgreSQL
Ở đây sử dụng PostgreSQL 9.6. Bạn có thể sử dụng các phiên bản PostgreSQL mới hơn
yum install -y https://download.postgresql.org/pub/repos/yum/reporpms/EL-7-x86_64/pgdg-redhat-repo-latest.noarch.rpm
yum install -y postgresql96 postgresql96-server postgresql96-devel
/usr/pgsql-9.6/bin/postgresql96-setup initdb
Cho phép xác thực password bằng md5 thay vì ident bằng các sửa 2 dòng trong file /var/lib/pgsql/9.6/data/pg_hba.conf như sau:
host    all             all             127.0.0.1/32            md5
host    all             all             ::1/128                 md5
Khởi động dịch vụ và cho phép nó khởi động cùng hệ thống
systemctl start postgresql-9.6
systemctl enable postgresql-9.6
Tạo user, password và databases sử dụng cho NetBox
sudo -u postgres psql
CREATE DATABASE netbox;
CREATE USER netbox WITH PASSWORD 'your_password';
GRANT ALL PRIVILEGES ON DATABASE netbox TO netbox;
\q
Lưu ý : Đăt mật khẩu của bạn và ghi nhớ mật khẩu này.
Thử đăng nhập với user vừa tạo
psql -U netbox -W -h localhost netbox
\conninfo
Nếu kết quả như sau là đã thành công. Để thoát bạn dùng \q
[root@netbox ~]# psql -U netbox -W -h localhost netbox
Password for user netbox:
psql (9.6.17)
Type "help" for help.

netbox=> \conninfo
You are connected to database "netbox" as user "netbox" on host "localhost" at port "5432".
Bước 2: Cài đặt Redis
Redis là một kho lưu trữ theo dạng key-value trên memory. NetBox sử dụng Redis để làm caching và queuing.
yum install -y epel-release
yum install -y redis
Khởi động dịch vụ và cho phép nó khởi động cùng hệ thống
systemctl start redis
systemctl enable redis
Sử dụng redis-cli để đảm bảo dịch vụ redis hoạt động
[root@netbox ~]# redis-cli ping
PONG
Bước 3: Cài đặt NetBox
Cài đặt python và một số gói cần thiết. Đối với NetBox từ phiên bản 2.8 sẽ yêu cầu python tối thiểu là phiên bản 3.6
yum install -y gcc python36 python36-devel python36-setuptools libxml2-devel libxslt-devel libffi-devel openssl-devel redhat-rpm-config
easy_install-3.6 pip
Download NetBox
yum install -y wget
wget https://github.com/netbox-community/netbox/archive/v2.8.3.tar.gz
tar -xzf v2.8.3.tar.gz -C /opt
cd /opt/
mv netbox-2.8.3/ netbox
cd /opt/netbox/
Tạo user netbox để sử dụng cho dịch vụ này
adduser netbox
chown --recursive netbox /opt/netbox/netbox/media/
Thiết lập môi trường python. Tạo một môi trường python ảo để chắc chắn các thư viện dùng cho NetBoxkhông bị xung đột với các ứng dụng khác. Ở đây sẽ tạo ra một thư mục venv bên trong thư mục root của NetBox
python3 -m venv /opt/netbox/venvKích hoạt môi trường và cài các gói yêu cầu
source venv/bin/activate
pip3 install -r requirements.txt
pip3 install rq==1.2
Bạn có thể cài thêm một số thư viện bổ sung như napalm và django-storages.
NAPALM cho phép NetBox tìm nạp dữ liệu trực tiếp từ các thiết bị và trả lại cho người yêu cầu thông qua API. NAPALM là một tùy chọn nên bạn có thể cài hoặc không. Để cài đặt dùng lệnh sau
pip3 install napalmdjango-storages là thư viện cho phép bạn sử dụng các filesystem trên máy khác. Bởi mặc định NetBox sẽ sử dụng filesytem tại local để lưu các file được tải lên. Để sử dụng các filesystem trên máy khác bạn cần cài thư viện django-storages và cấu hình trong file configuration.py
pip3 install django-storagesCấu hình
Tạo file configuaration.py
cd /opt/netbox/netbox/netbox/
cp configuration.example.py configuration.py
Mở file configuration.py để sửa các thông tin sau:
ALLOWED_HOSTS
Khai báo địa chỉ IP hoặc domain mà bạn có thể truy cập vào NetBox. Ví dụ:
ALLOWED_HOSTS = ['netbox.niemdt1.com','10.10.35.129']DATABASE
Khai báo thông tin để đăng nhập PostgreSQL. Thông tin user và mật khẩu bạn tạo ở bước 1
DATABASE = {
    'NAME': 'netbox',               # Database name
    'USER': 'netbox',               # PostgreSQL username
    'PASSWORD': 'your_password', # PostgreSQL password
    'HOST': 'localhost',            # Database server
    'PORT': '',                     # Database port (leave blank for default)
    'CONN_MAX_AGE': 300,            # Max database connection age
}
REDIS
Nếu không có thay đổi gì cấu hình của redis ở bước 2 bạn có thể để mặc định ở đây
REDIS = {
    'tasks': {
        'HOST': 'localhost',
        'PORT': 6379,
        # Comment out `HOST` and `PORT` lines and uncomment the following if using Redis Sentinel
        # 'SENTINELS': [('mysentinel.redis.example.com', 6379)],
        # 'SENTINEL_SERVICE': 'netbox',
        'PASSWORD': '',
        'DATABASE': 0,
        'DEFAULT_TIMEOUT': 300,
        'SSL': False,
    },
    'caching': {
        'HOST': 'localhost',
        'PORT': 6379,
        # Comment out `HOST` and `PORT` lines and uncomment the following if using Redis Sentinel
        # 'SENTINELS': [('mysentinel.redis.example.com', 6379)],
        # 'SENTINEL_SERVICE': 'netbox',
        'PASSWORD': '',
        'DATABASE': 1,
        'DEFAULT_TIMEOUT': 300,
        'SSL': False,
    }
}
SECRET_KEY
Tạo một secret key với ít nhất 50 ký tự bao gồm cả số và chữ. Key này phải được bảo mật và không được chia sẻ ra bên ngoài. Bạn có thể tạo key bằng cách sau:
python /opt/netbox/netbox/generate_secret_key.pySử dụng chuỗi được tạo ra làm secret key
SECRET_KEY = '5PKq1pe_vgAI2C+9otf#QjmS$wkd&OnME-*T=NhV6J0zla)@^Z'Thực hiện migration database
Sử dụng python để thực hiện migration
cd /opt/netbox/netbox/
python manage.py migrate
Nếu quá trình migration bị lỗi bạn cần xem lại các khai báo DATABASE trong file configuration.py
Tạo user cho NetBox
Bạn cần tạo một super user để đăng nhập NetBox
python manage.py createsuperuserSau đó khai báo thông tin cho user
(venv) [root@netbox netbox]# python manage.py createsuperuser
Username (leave blank to use 'root'): admin
Email address: your_email@gmail.com
Password:
Password (again):
Superuser created successfully.
Collect các file tĩnh
Sử dụng lệnh sau:
python manage.py collectstatic --no-inputKết quả như sau:
(venv) [root@netbox netbox]# python manage.py collectstatic --no-input

976 static files copied to '/opt/netbox/netbox/static'.
Thử đăng nhập
Đến đây NetBox đã có thể chạy. Dùng lệnh sau để kiểm tra
python manage.py runserver 0.0.0.0:8000 --insecureTa sẽ thấy như sau:
(venv) [root@netbox netbox]# python manage.py runserver 0.0.0.0:8000 --insecure
Performing system checks...

System check identified no issues (0 silenced).
May 11, 2020 - 18:19:07
Django version 3.0.6, using settings 'netbox.settings'
Starting development server at http://0.0.0.0:8000/
Quit the server with CONTROL-C.
Trên giao diện web truy cập địa chỉ http://ip_netbox:8000
Lưu ý để truy cập được bằng địa chỉ IP này thì ở mục ALLOWED_HOST bên trên bạn phải khai báo địa chỉ IP này
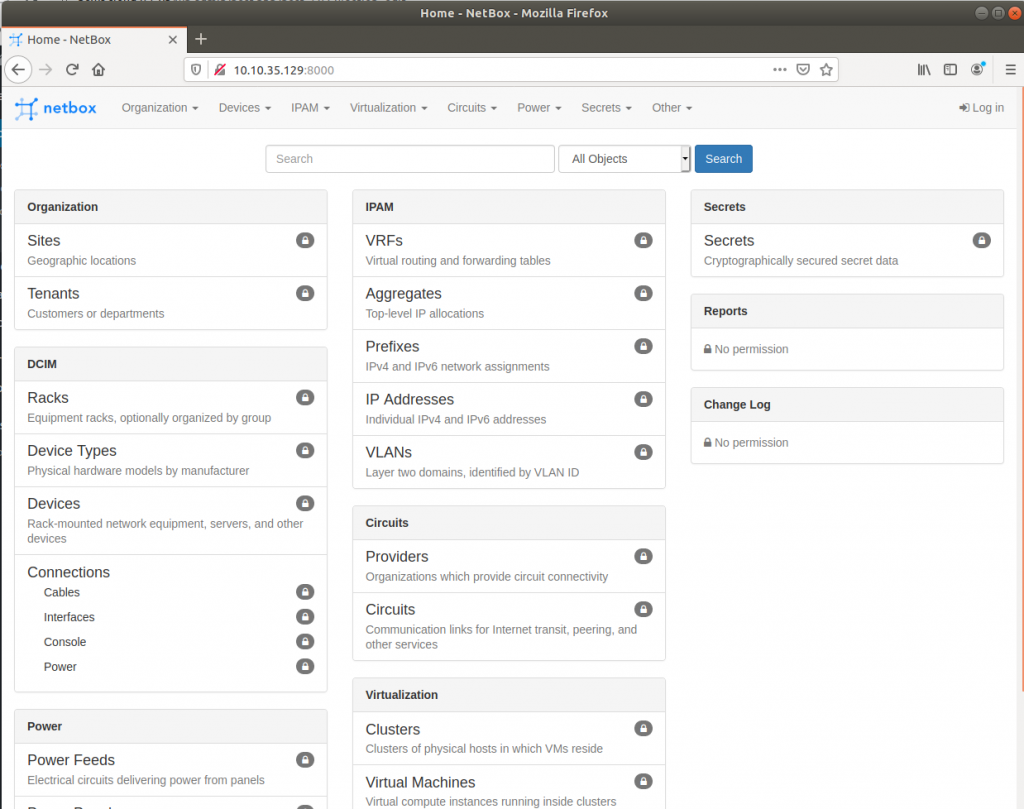
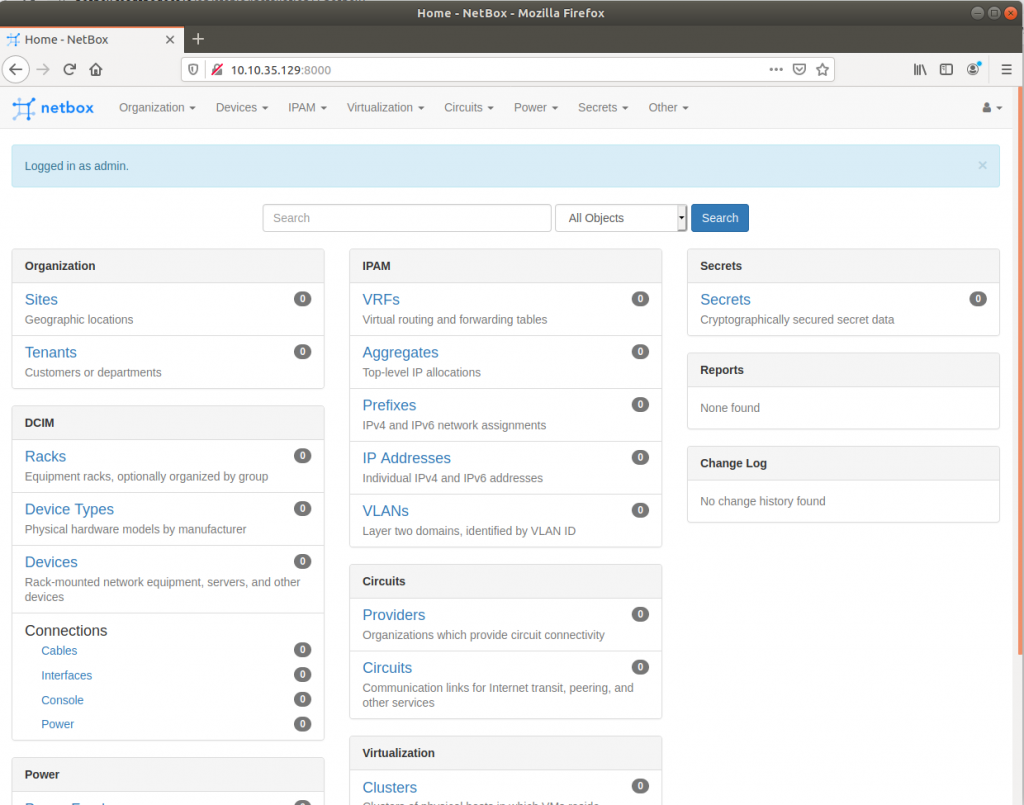
Sử dụng user NetBox tạo ở bên trên để đăng nhập
Bước 4: Cấu hình HTTP
Ở đây sẽ sử dụng Nginx làm web server và sử dụng systemd để cho phép NetBox chạy daemon.
Có 2 cách để cấu hình Nginx cho netbox. Bạn có thể cài đặt Nginx tại máy cài Netbox hoặc có thể sử dụng Nginx trên một máy khác làm revert proxy.
Cách 1: Sử dụng nginx ngay tại máy cài Netbox
Tạo chứng chỉ SSL
mkdir /etc/ssl/private
openssl req -x509 -nodes -days 365 -newkey rsa:2048 -keyout /etc/ssl/private/netbox.key -out /etc/ssl/certs/netbox.crt
Khai báo các thông tin cần thiết để tạo chứng chỉ
(venv) [root@netbox netbox]# openssl req -x509 -nodes -days 365 -newkey rsa:2048 -keyout /etc/ssl/private/netbox.key -out /etc/ssl/certs/netbox.crt
Generating a 2048 bit RSA private key
.................+++
...........+++
writing new private key to '/etc/ssl/private/netbox.key'
-----
You are about to be asked to enter information that will be incorporated
into your certificate request.
What you are about to enter is what is called a Distinguished Name or a DN.
There are quite a few fields but you can leave some blank
For some fields there will be a default value,
If you enter '.', the field will be left blank.
-----
Country Name (2 letter code) [XX]:VN
State or Province Name (full name) []:NH
Locality Name (eg, city) [Default City]:Ha Noi
Organization Name (eg, company) [Default Company Ltd]:NH
Organizational Unit Name (eg, section) []:
Common Name (eg, your name or your server's hostname) []:netbox.example.com
Email Address []:your_email@gmail.com
Cài đặt Nginx
Cấu hình selinux
setenforce 0
sed -i 's/SELINUX=enforcing/SELINUX=disabled/g' /etc/sysconfig/selinux
sed -i 's/SELINUX=enforcing/SELINUX=disabled/g' /etc/selinux/config
Cài đặt nginx
yum install -y nginxCopy file cấu hình mặc định vào thư mục cấu hình của Nginx
cp /opt/netbox/contrib/nginx.conf /etc/nginx/conf.d/netbox.confVào file /etc/nginx/conf.d/netbox.conf khai báo domain của bạn vào dòng server_name. Lưu ý doamin này phải được khai báo ở trong trong mục ALLOWED_HOSTS trong file configuaration.py ở bước 3.
Ví dụ tôi sử dụng domain netbox.niemdt1.com thì file netbox.conf của tôi có nội dung như sau:
[root@netbox]# cat /etc/nginx/conf.d/netbox.conf
server {
    listen 443 ssl;

    # CHANGE THIS TO YOUR SERVER'S NAME
    server_name netbox.niemdt1.com;

    ssl_certificate /etc/ssl/certs/netbox.crt;
    ssl_certificate_key /etc/ssl/private/netbox.key;

    client_max_body_size 25m;

    location /static/ {
        alias /opt/netbox/netbox/static/;
    }

    location / {
        proxy_pass http://127.0.0.1:8001;
        proxy_set_header X-Forwarded-Host $http_host;
        proxy_set_header X-Real-IP $remote_addr;
        proxy_set_header X-Forwarded-Proto $scheme;
    }
}

server {
    # Redirect HTTP traffic to HTTPS
    listen 80;
    server_name netbox.niemdt1.com;
    return 301 https://$host$request_uri;
}
Restart và cho phép nginx khởi động cùng hệ thống
systemctl restart nginx
systemctl enable nginx
Cách 2: Sử dụng Nginx trên một máy khác
Với mô hình này sẽ sử dụng nginx trên một máy khác làm revert proxy cho netbox.
Cài đặt Nginx trên máy cài Netbox
Cấu hình selinux
setenfoce 0
sed -i 's/SELINUX=enforcing/SELINUX=disabled/g' /etc/sysconfig/selinux
sed -i 's/SELINUX=enforcing/SELINUX=disabled/g' /etc/selinux/config
Cài đặt nginx
yum install -y nginxTạo file cấu hình
vi /etc/nginx/conf.d/netbox.confFile này có nội dung như sau:
server {
    listen 8000;

    client_max_body_size 25m;

    location /static/ {
        alias /opt/netbox/netbox/static/;
    }

    location / {
        proxy_pass http://127.0.0.1:8001;
        proxy_set_header X-Forwarded-Host $http_host;
        proxy_set_header X-Real-IP $remote_addr;
        proxy_set_header X-Forwarded-Proto $scheme;
    }
}
Lưu thay đổi sau đó khởi động lại dịch vụ nginx
systemctl restart nginx
systemctl enable nginx
Cấu hình trên revert proxy
Tạo chứng chỉ SSL
mkdir /etc/ssl/private
openssl req -x509 -nodes -days 365 -newkey rsa:2048 -keyout /etc/ssl/private/netbox.key -out /etc/ssl/certs/netbox.crt
Khai báo các thông tin cần thiết để tạo chứng chỉ
(venv) [root@netbox netbox]# openssl req -x509 -nodes -days 365 -newkey rsa:2048 -keyout /etc/ssl/private/netbox.key -out /etc/ssl/certs/netbox.crt
Generating a 2048 bit RSA private key
.................+++
...........+++
writing new private key to '/etc/ssl/private/netbox.key'
-----
You are about to be asked to enter information that will be incorporated
into your certificate request.
What you are about to enter is what is called a Distinguished Name or a DN.
There are quite a few fields but you can leave some blank
For some fields there will be a default value,
If you enter '.', the field will be left blank.
-----
Country Name (2 letter code) [XX]:VN
State or Province Name (full name) []:NH
Locality Name (eg, city) [Default City]:Ha Noi
Organization Name (eg, company) [Default Company Ltd]:NH
Organizational Unit Name (eg, section) []:
Common Name (eg, your name or your server's hostname) []:netbox.example.com
Email Address []:your_email@gmail.com
Tạo file cấu hình nginx
vi /etc/nginx/conf.d/netbox.confFile này có nội dung như sau. Sửa domain và địa chỉ của Netbox của bạn
[root@nginx]# cat /etc/nginx/conf.d/netbox.conf
server {
    listen 443 ssl;

    # CHANGE THIS TO YOUR SERVER'S NAME
    server_name nb.niemdt1.com;
    ssl_certificate /etc/ssl/certs/netbox.crt;
    ssl_certificate_key /etc/ssl/private/netbox.key;

    client_max_body_size 25m;

    location / {
        proxy_pass http://10.10.35.129:8000;
        proxy_set_header X-Forwarded-Host $http_host;
        proxy_set_header X-Real-IP $remote_addr;
        proxy_set_header X-Forwarded-Proto $scheme;
    }
}

server {
    # Redirect HTTP traffic to HTTPS
    listen 80;
    server_name nb.niemdt1.com;
    return 301 https://$host$request_uri;
}
Thực hiện restart lại nginx
nginx -t
nginx -s reload
Bước 5: Cấu hình systemd
Quay trở lại máy cái Netbox để thực hiện các bước tiếp theo
Copy file gunicorn.py. Đây là file khai báo địa chỉ và port để truy cập NetBox
cp /opt/netbox/contrib/gunicorn.py /opt/netbox/gunicorn.pyĐể NetBox chạy như một chương trình daemon chúng ta có thêm nó vào systemd
cp /opt/netbox/contrib/*.service /etc/systemd/system/Khởi động netbox và netbox-rq
systemctl daemon-reload
systemctl start netbox netbox-rq
systemctl enable netbox netbox-rq
Bây giờ trên trình duyệt bạn có thể truy cập vào domain để truy cập netbox
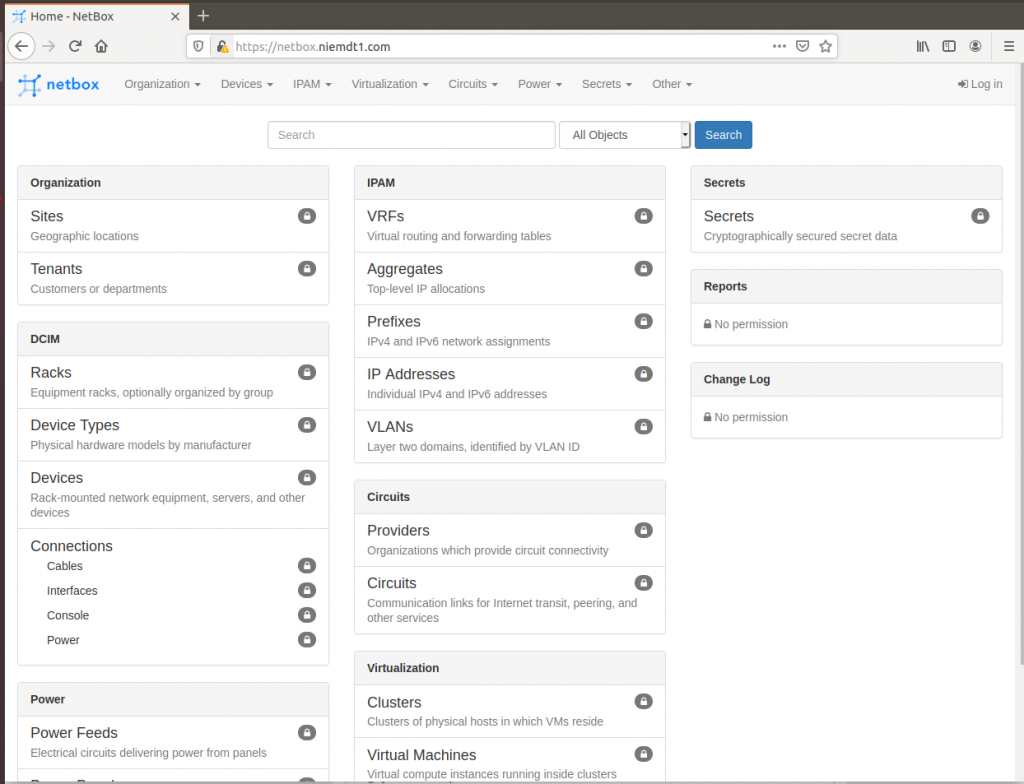
Đến đây việc cài đặt đã thành công.
Leave a Reply