Samba là dịch vụ của hệ điều hành Linux, chạy trên nền giao thức SMB (Server Message Block) cho phép chia sẻ file và máy in với các máy chạy Windows. SMB là giao thức được các hệ điều hành của Microsoft sử dụng để chia sẻ dữ liệu qua mạng. Linux Samba cũng dựa vào giao thức SMB để viết ra một số tiến trình điển hình như smbd, nmbd, để “nói chuyện “ với các hệ điều hành của Microsoft để người dùng có thể làm việc với máy Linux qua Network Neighborhood.
1. Giới thiệu về Samba
Samba là một ứng ụng chạy trên Unix và nó mô phỏng một hệ thống Windows. Samba cho phép một hệ thống Unix gia nhập vào “Network neighborhood” và người dùng Windows có thể truy cập tài nguyên trên Unix.
Samba thực hiện được nhờ vào sự mô phỏng giao thức CIFS hay” Common Internet File System” và giao thức truyền tin SMB hay “Server Message Block”
Nói gọn lại samba là một phần mệ miễn phí chủ yếu sử dụng để chia sẻ file giữa các nền tảng khác nhau như Windows và Linux bằng cách sử dụng giao thức SMB/CIFS.
Samba bao gồm 2 chương trính chính và một số công cụ hỗ trợ. Hai chương trình chính là.
- smbd : dịch vụ tệp và máy in, xác thực phân quyền truy cập tài nguyên.
- nmdb : Phân giải tên và thông báo cá dịch vụ ra bên ngoài
Một sô công cụ hỗ trợ samba là.
- smbclient: có chức năng tương tự NFS, kết nối từ hệ thống unix tới smb share của một hệ thống windows để truyền tệp, gửi tệp.
- nmblookup: Phân giải tên NetBIOS. để tìm địa chỉ IP tương ứng và các thông tin của máy chạy Windows
- swat : cho phép cấu hình samba qua giao diện web.
2. Mô hình
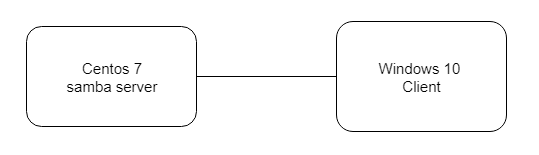
3. Hướng dẫn cấu hình Samba trên máy Centos
Chuẩn bị
- 1 máy centos 7, 1 máy win
- sử đụng chung dải mạng NAT
Cấu hình Samba Sever
- Tiến hành cài đặt các gói Samba:
yum install samba samba-client samba-common
- Cho phép Samba dùng tường lửa
firewall-cmd --permanent --zone=public --add-service=samba firewall-cmd --reload
Hoặc mở port cho Samba kết nối :
firewall-cmd --permanent --add-port=137/tcp
firewall-cmd --permanent --add-port=138/tcp
firewall-cmd --permanent --add-port=139/tcp
firewall-cmd --permanent --add-port=445/tcp
firewall-cmd --permanent --add-port=901/tcp
firewall-cmd --reload
Cấu hình máy Win
- Chuột phải vào
This PC hoặc My Computer → Properties → Advanced system settings → Computer Name.

Đổi workgroup của máy Win là WORKGROUP
- Tắt hết tường lửa trên máy win
Lựa chọn 1: Truy cập chế độ công khai
Cấu hình trên Centos
1. Chạy lệnh sau để lưu 1 bản config.
cp /etc/samba/smb.conf /etc/samba/smb.conf.orig
2. Tạo một thư mục cần share và phân quyền cho thư mục
mkdir -p /srv/samba/anonymous
chmod -R 0775 /srv/samba/anonymous
chown -R nobody:nobody /srv/samba/anonymous
3. Cho phép truy cập từ SELinux
Tắt SELinux.
vim /etc/sysconfig/selinux
Đặt giá trị SELINUX = disabled.
Reset máy để thay đổi có hiệu lực.
Cách khác :
Điểm lưu ý thêm là trong CentOS hệ thống bảo mật sử dụng bởi nhiều lớp, thư mục tuan hay public gì đó do ta tạo ra cũng cần phải báo cho SELinux biết rằng nó không phải là thư mục hệ thống được bảo vệ mà là thư mục quản lý bởi samba, điều này được thực hiện bằng lệnh
chcon –t samba_share_t /<path-filename>
Ở demo này tôi làm như sau
chcon -t samba_share_t /srv/samba/anonymous
4. Chỉnh sửa file config
vim /etc/samba/smb.conf
Nội dung file config
[global]
	workgroup = WORKGROUP
	netbios name = centos
	security = user
[Anonymous]
	comment = Anonymous File Server Share
	path = /srv/samba/anonymous
	browsable =yes
	writable = yes
	guest ok = yes
	read only = no
	force user = nobody
5. Kiểm tra samba setting bằng câu lệnh sau
testparm
Nó sẽ in ra nội dung tương tự như sau
Load smb config files from /etc/samba/smb.conf
rlimit_max: increasing rlimit_max (1024) to minimum Windows limit (16384)
Processing section "[homes]"
Processing section "[printers]"
Processing section "[print$]"
Processing section "[Anonymous]"
Loaded services file OK.
Server role: ROLE_STANDALONE

Press enter to see a dump of your service definitions

# Global parameters
[global]
	netbios name = centos
	printcap name = cups
	security = USER
	idmap config * : backend = tdb
	cups options = raw
[homes]
	comment = Home Directories
	browseable = No
	inherit acls = Yes
	read only = No
	valid users = %S %D%w%S
[printers]
	comment = All Printers
	path = /var/tmp
	browseable = No
	printable = Yes
	create mask = 0600
[print$]
	comment = Printer Drivers
	path = /var/lib/samba/drivers
	create mask = 0664
	directory mask = 0775
	write list = root
[Anonymous]
 	comment = Anonymous File Server Share
	path = /srv/samba/anonymous
	force user = nobody
	guest ok = Yes
	read only = No
6. Bật và khởi động Samba Services để nó chạy tự động sau mỗi lần khởi động máy
systemctl enable smb.service
systemctl enable nmb.service
systemctl start smb.service
systemctl start nmb.service
Test thử trên máy win
-
Bấm tổ hợp phím
Win + R - Nhập địa chỉ IP của Sever
\\192.168.43.168

Và chúng ta sẽ tìm thấy máy Centos như trong ảnh. Truy cập và thử tạo file
Lựa chọn 2: Truy cập chế độ bảo mật
Cấu hình trên Centos
Đầu tiên tạo người dùng và group muốn để bảo mật, sau đó đặt mật khẩu truy cập cho từng người dùng
groupadd smbgrp
usermod tecmint -aG smbgrp
smbpasswd -a tecmint
Sau đó tạo và phân quyền thư mục cho file
mkdir -p /srv/samba/secure
chmod -R 0770 /srv/samba/secure
chown -R root:smbgrp /srv/samba/secure
chcon -t samba_share_t /srv/samba/secure
Sau đó chỉnh sửa file config
vim /etc/samba/smb.conf
Nội dung file config
[Secure]
	comment = Secure File Server Share
	path =  /srv/samba/secure
	valid users = @smbgrp
	guest ok = no
	writable = yes
	browsable = yes
Kiểm tra
testparm
Khởi động lại dịch vụ
systemctl restart smb.service
systemctl restart nmb.service
Kiểm tra xem kết nối trên Win đã hoạt động
-
Bấm tổ hợp phím
Win + R - Nhập địa chỉ IP của Sever
\\192.168.43.168

Và chúng ta đã bảo mât được thư mục Secure.
Nguồn tham khảo:
https://github.com/thanh474/thuc-tap/blob/master/tim-hieu-va-lab-samba/samba.md
https://uet.vnu.edu.vn/~thanhld/lects/netos/Tuan%2015%20-%20SMB.html
https://sites.google.com/site/anhtt01/bai-viet/centos/samba-server
Leave a Reply